Brew Dudes

Homebrewing Blog and Resource

The hobby of homebrewing beer

Tasting My Small Batch Lager

Does anyone remember that small one gallon dark lager I brewed up back in January? If not you can find that video post here.

This week we finally get around to giving it a taste. To be fair, John has been ready to taste if for over a month. Encouraging me to get that beer in some bottles and get it on camera. I finally racked that little guy into a keg instead, put it under some high pressure overnight and this video is all about our initial impressions.

This beer wasn’t too bad. Despite it sitting on the yeast cake for over a month, no controlled temperature settings, no true lager phase, no attention to pitching rate, no real love for two months! There were two pretty interesting results from this little experiment:

First:
This beer was 90+% Pilsner malt. As part of a totally uncontrolled experiment I shortened my boil time to 30 minutes. Heresy! Normally we all believe that pilsner malt based worts need an long boil time to help drive off DMS. This beer had very little detectable DMS. That could be due to a couple things. The small boil volume geometry was such that the surface area was greater than the depth of the beer. So there was plenty of volitalization opportunity. The beer also sat on the yeast for quite some time. Perhaps that lager yeast cake was able to slowly work through some of that DMS if there was any there at all.

Second:
Also related to the shorter boil time is how we perceived the hops. I used only Warrior hops. But the shortened boil length probably balanced the bitterness with some hop flavor. You never really see Warrior alone in a recipe let alone any later than the first hop charge in the recipe. Warrior is known as a “clean” bittering hop. There was a distinct hop flavor in this beer that accompanied a noticeable bittering quality. The flavor was somewhere between a mild mint and an under ripe green melon (not really fruity, but refreshing and green tasting). I sort of liked the flavor and it might be fun to play with that flavor again. Now that I think of it, using Warrior as a bittering charge then a late addition at flame out in a Saison might be interesting.

So the small batch brewing was convenient and fast. Seeing as I didn’t give it much attention I can’t really complain about the flavor profile. However, my 3/4 gallon batch doesn’t leave much room for tasting, aging or lagering after the fact.
That said, if our winter doesn’t break here soon in the Northeast; I might be right back at the small batch one more time.

Do you have any thoughts on this experiment? The DMS/Pilsner v. boil time debate? Ever tried Warrior all on its own or as an aroma hop? Drop us a comment either here or on the YouTube channel.

BREW ON!
Nelson Sauvin Braggot Recipe

I have had this idea for a braggot since I learned about the flavor characteristics of Nelson Sauvin hops.

White wine notes along with pale malts and many pounds of light colored honey are the things that meld nicely in my mind. Here is the plan to have them come together in a braggot recipe.

This brew is more mead than beer but that’s sort of the point. The strategy would be to ferment it dry and carbonate it to unleash the hop aromas.

Ingredients:

4 lbs American 2 Row Malt
.5 lbs Dextrine Malt
12 lbs Alfalfa Honey
.5 oz Warrior hops pellets (16% AA) boiled 60 minutes
1 oz Nelson Sauvin pellets (14% AA) boiled 15 minutes
1 oz Nelson Sauvin pellets (14% AA) boiled 1 minute
Yeast: 2 packets of dry Champagne yeast

1 tsp of yeast nutrient
1 tsp of yeast energizer

Predictions:

Original Gravity: 1.099
Final Gravity: 1.019*
Color 1.81 °SRM
Bitterness: 51.5 IBUs
Alcohol (% of volume): 10.6 %

*Calculations based on WLP001 yeast performance but the final gravity can get lower with champagne yeast.

Instructions:

Conduct a small mash with the four pounds of 2-row malt and the dextrine malt. Mash at 149°F for one hour. If you don’t have the means to do a small mash, you can substitute with extra light dry malt extract. My calculations swap the malt for 2.5 pounds of extra light dry malt extract.

Boil the wort for 60 minutes and add hops at times detailed above. Add the honey at the end of the boil after the last hops addition. Chill wort down to 70°F, aerate, and add yeast nutrient and energizer.

Add proofed dry yeast packets and ferment at room temperature for 3 weeks. Take a gravity reading to see how close to 1.000 the braggot is.

If fermentation is finished, rack to a clean and sanitized carboy for a conditioning phase. This phase can last for a couple of months but use your virtue of patience to guide you.

To bottle, proof a half packet of champagne yeast. Add a cup of honey along with the proofed yeast to your bottling bucket.

Bottle the braggot in thick champagne bottles and cork using cages. Age for 6 months before serving.

With the carbonation and the light color, you will be expanding the idea of what beer can be.

Australian Topaz Hops

Over the past few months, I have been collecting hops by the ounce. I’ll go into the local home brew shop with the intent to buy something else, but a quick look through the fridge will always reveal a new variety that will somehow be added to my purchase.

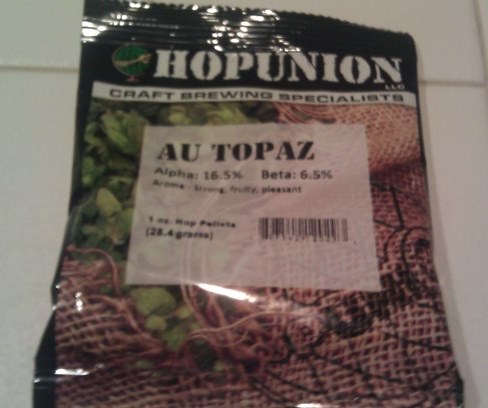
One of the varieties in my collection is Australian or AU Topaz hops. It’ll be a part of a great hoppy beer that I am dreaming up which will also feature Pacific Jade hops and a few ounces of our tested and approved Sorachi Ace hops.

Topaz hops

A little history: In 1985, Topaz was bred at the Rostrevor Breeding Garden in the town of Myrtleford in Victoria, AU by Hop Products Australia. It was supposed to be a variety that would be  exclusively grown and processed to make hop extract, but in 2007/2008, it made its way into a brew kettle or two.   From there, its unique characteristics were given the proper showcase so much that they are now available to homebrewers like you and me.

I am excited to see how Topaz melds with the other hops. Let’s now read the particulars of this variety from the Southern Hemisphere:

Origin: Australia

Aroma/Flavor:  There are many different descriptors out there.  When used during the boil, it imparts a light tropical fruit taste, similar to the lychee fruit.  Other labels include berry, passion fruit, citrus (tangerine), spice, and apricot.  When used in dry hopping, dank, resinous, grassy tones shine through to the finished beer.

Alpha Acid: 15 – 18%

Typical Usage: Because of the high alpha, bittering is a good choice for usage but the flavors and aromas that this hop brings to the party when used later in the boil makes it a good dual purpose variety.

Beer Styles: Fruity IPAs and APAs.  Some sources said that it had earthy tones like English hops do so maybe an Extra Special Bitter that really has something extra special to it.

I read that these hops are similar to Galaxy hops, which I profiled a while ago.   It’s about time I put these fruity hops to the test and made a true nouveau hoppy beer.   When I post the recipe, I will link to it from here.  Cheers and brew on.

Replies to Blog Comments

This week’s video is pretty straight forward.  We decided to talk about a few comments left by readers.  The intent was to maybe add a little something that we didn’t respond to or to give a little nod to your efforts for commenting.

We really appreciate the comments we get and wanted to take a moment to respond to a couple of them.  Keep the comments coming and we can take it a little further in the future.

The first comment comes from John’s Mosaic SMaSH Recipe post.  Do those Moasaic Hops really have a blueberry character to them? Vinny weighs in with personal experiences with similar hops.

The second comment comes from Mike’s Bottle Dregs Update post.  More like a culturing failure, but Fred and Jeff both offer suggestions for getting some souring bugs ready for wort.

The last comment we picked out of the pile was in reply to John’s Grain Mill Purchase post. Jym Ferrier tells us about the status of his mill after 2 years of service.

We just picked out a few and plan to chat about more in the future.  Got something to say? Leave a comment and maybe we’ll pull you out the hat next time!

BREW ON!

Dunkelweizen Brew Day Recap

It was a Sunday brew day at my house this weekend. The dunkelweizen recipe that I had threatened to brew since last 2012 was finally put into action yesterday afternoon.

This brew day was also the inaugural run of the grain mill I bought, but silly me forgot to take a gravity reading at the end of the boil to calculate my brewhouse efficiency. Although it was nice to get the process down of crushing the grain during the time I was heating my water to mash temperature, it would have been nice to collect that piece of data to see if the mill needed any adjustment.

Oh well, we figure that one out later. Outside of that moment of forgetfulness from me, I brewed fairly well.

The base of this recipe called for 6 pounds of malted wheat and 3 pounds of munich malt. With all of that wheat, there is always a fear that a stuck sparge may happen. To protect myself, I added some rice hulls to the mash and I didn’t have any problems collecting wort at all.

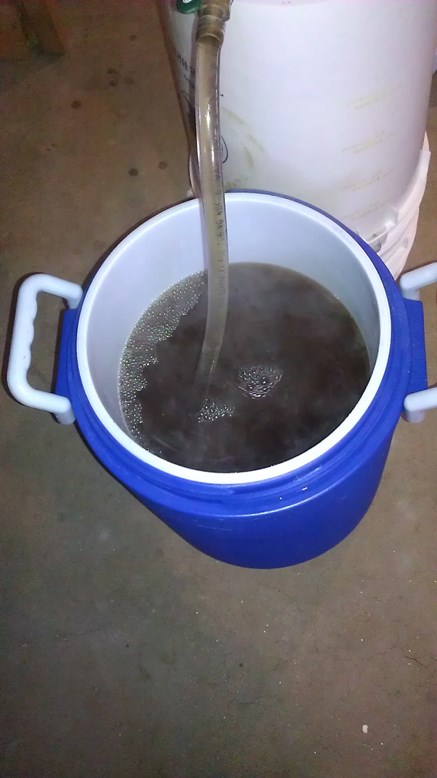
Dunkelweizen Wort Collection

The first wort collection was a deep amber color. The second collection, following the batch sparging method, the wort was running fairly clear and blond-ish by the end.

Because I had just over an ounce of homegrown Magnum left over from the harvest hanging out in my freezer, they were given a home in the Dunkelweizen boil.

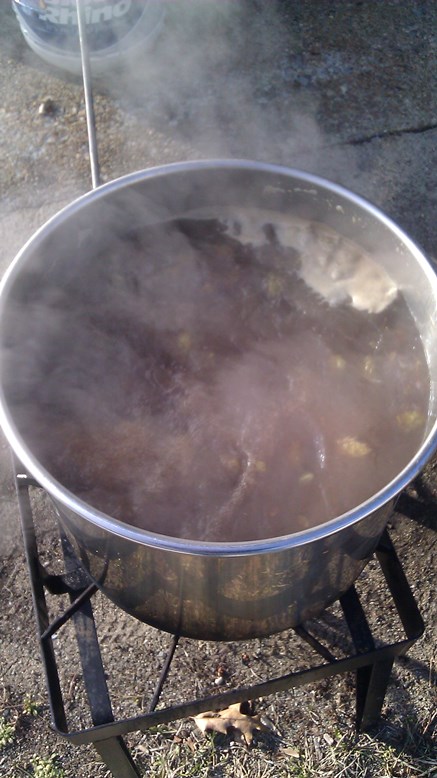
Dunkelweizen Boil

Even though I have written this before, whole hops swimming in your wort may be one of the prettiest sights on a brew day. They do lose their green color after the hour in the boil but the first several minutes after you add them are pretty special – much better than the scum you get after adding pellets.

Since the fermentation temperature is crucial to this recipe and style (I need to keep it to 62°F), it was important for me to chill the wort well. When I checked it, it was at 56°F after a half hour chill period. The cold weather is good for some things.

I bought two packets of Wyeast 3068 Weihenstephan Wheat that I smacked and they swelled up nicely. Their manufacture date was less than a month ago which may be some of the freshest yeast I have ever used. I poured them right into the fermentor and because I have had problems with messy fermentations, I bought a little insurance.

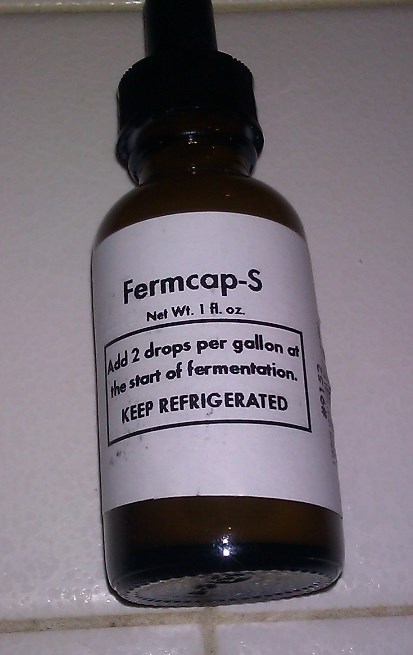
Fermcap-S

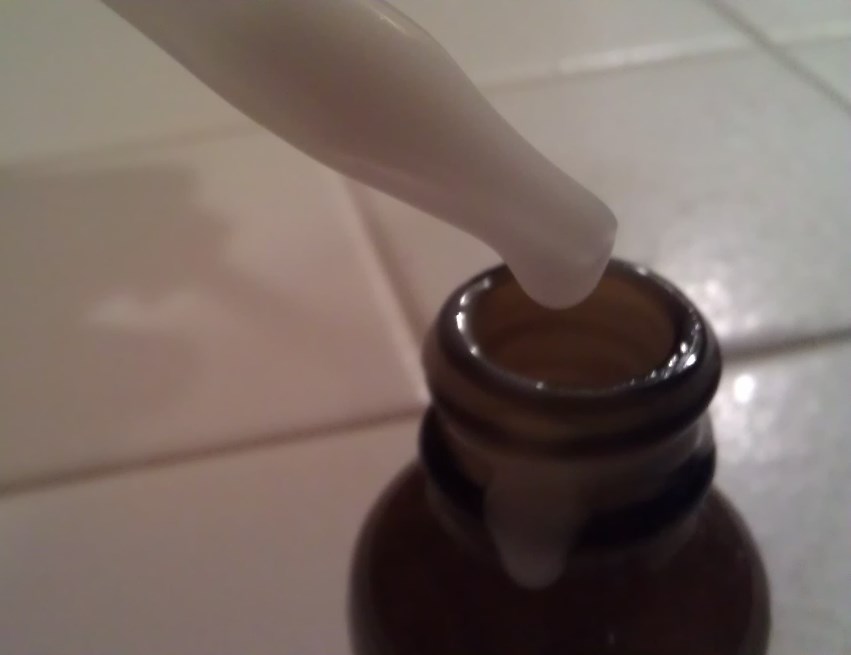
This stuff called Fermcap-S is supposed to keep the krausen from getting out of hand. I followed the instructions on the bottle and add 10 drops of Fermcap to the top of the wort. They were simple instructions but unfortunately the stuff has the consistency of Elmer’s glue and was tough to collect in the dropper and add to the wort.

Fermcap Drops

Pretty stuff, eh? Twenty four hours later, the krausen is beginning to form and the temperture is sitting at 61°F. If the cold weather in our area continues, I might as well use it to make great beer.

Page 141 of 322

Powered by WordPress & Theme by Anders Norén