Brew Dudes

Homebrewing Blog and Resource

The hobby of homebrewing beer

Cider Competition Blues

The path to making great cider has not been one I have travelled long. It’s been just over four years since I started but I won’t feel like I have really ascertained true cider zen until I can convince a few judges to give me a medal in competition.

There, I wrote it.

The achievement of placing in competition has only been a goal of mine for a couple of years. The first few batches of cider I made weren’t good for anyone anywhere.

Now I feel like I have the cider making process down and the ones I make are pretty good. Well, I think they’re good.

But until I get a place to stand on the podium, I won’t know for sure. So I entered the last few bottles of a cider I made last year into the Boston Homebrew Competition. A few days ago I got my score sheets back and I found the ones for the cider out of the ordinary.
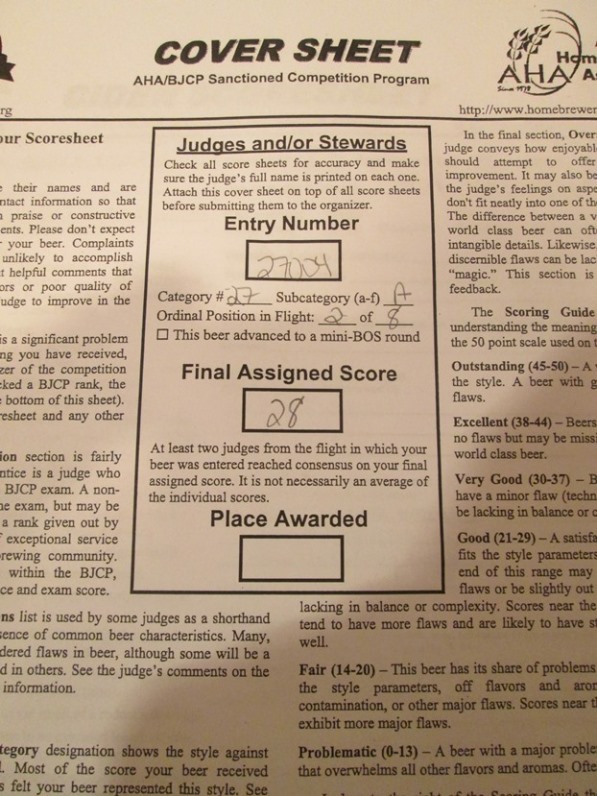
Cider Scoresheet Cover Page

The final score was fine enough. I was pushing to get into the 30s but I’ll take what I can get. As I looked through the sheets, I discovered a wide difference in the scores I received.
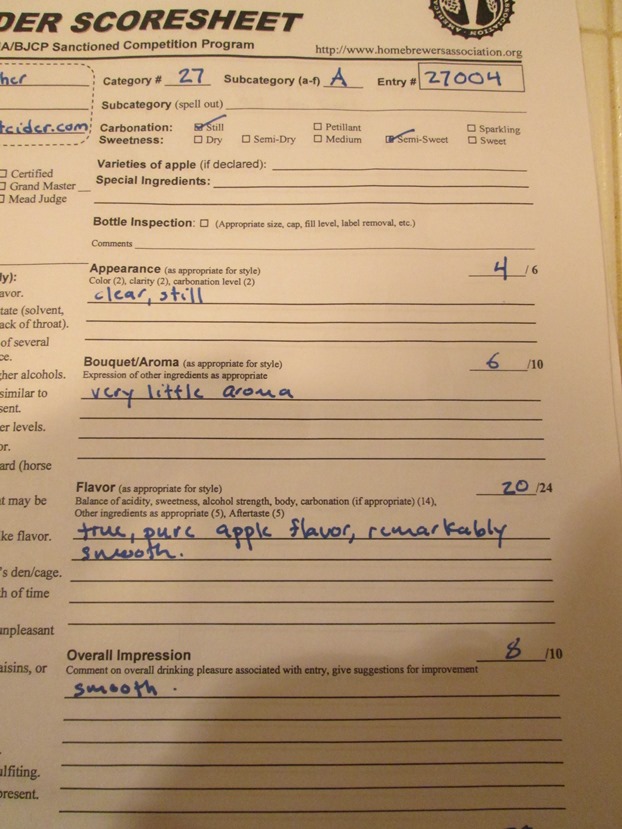
Scoresheet 1

One judge gave me a fairly high score and had some comments to go along with why he scored it that way.
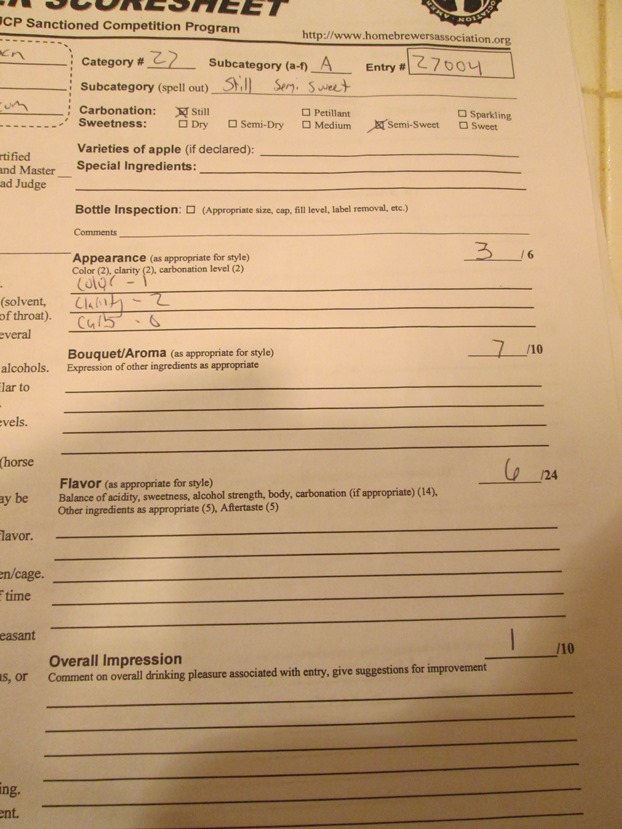
Scoresheet 2

Another judge gave me a very low score with very little commentary. The 1 out 10 for Overall Impression was the real kicker. I would have liked to know why the summary score was so poor.

Last night, I wrote an email to both of these judges to get some follow up thoughts on their sheets, along with a message to the president of the club that put on the competition to understand the process of how they scored entries.

Both the judges wrote back to me this morning. You can probably guess which one had more to say that the other one. Since they are both owners of a craft cidery in my neck of the woods, I am glad they are taking part in homebrew competitions and replying to emails from idiot bloggers like me who are intent to figure out how to make great cider at home.

Dear readers, I write this post questioning every keystroke. Am I being petty and making excuses for the behavior of a sore loser by presenting this post to you? I ran the idea by Mike and he greenlighted it so he’s partially to blame for this tangent into self-interest.

The overarching thought that I have to this whole situation is the collective palate of cider drinkers in this country. Do we really know what an excellent cider tastes like?

I have had wine like ciders, English ciders out of a tap at a London pub, soda-like ciders made by huge brewing conglomerates, and craft ciders made at small cideries near my home.

One thing is true about all of them, they all taste different. Does more definition need to come to the category?

Maybe I need to enter into cider specific competitions.

It doesn’t matter what the answers to these questions are. I know I am going to keep trying.
Culturing Bottle Dregs Follow Up

Two weeks ago I talked about culturing up some souring microbes from a bottle of Petrus’ Oud Bruin.  In that post I added a little bit of starter wort to the bottle sediment to see if I could get a culture going.  The plan was to give it 4-5 warm days in the bottle then step up to a 500mL culture in a larger flask.

Well…. I didn’t quite get around to it as soon as I should have and it seems to have failed.
)
I looked at it around day 5 and saw a distinct increase in the volume of the sediment in the base of the bottle.  Something had indeed begun to grow.  The wort also seemed to be a little ‘ropey’ suggesting an even more dynamic culture that I would have thought so soon.  I didn’t really get back to the culture until a full two weeks after “pitching”.

Now as you can see in the video, there is a good head of mold on the top of it and that ropiness is connected to it.  I suspect maybe even at day 5 those ropes were the start of mold.

Now I am left to wonder:

  1. Did the culture not take off at all.  Was the sediment just not viable?
  2. Did my starter wort (1.030 OG) not provide enough nutrients to get the microbes off the ground fast enough?  Hopefully a good culture would have lowered the pH to the point where the mold wasn’t going to grow.
  3. Did I contaminate the wort myself at the outset and the project failed because of that?
  4. What to do differently next time with a different sour cultured beer?

I am still thinking it over, and I won’t be deterred.
Do you have any advice for me on this one?
Leave us a comment and tell me what I did wrong!
BREW ON!

Conditioning Mead With Oak Chips

Three weeks of primary fermentation was enough to get my mixed berry mead or melomel down to a gravity of 1.000 from a starting gravity of 1.096.  After I checked the reading, it was clear that the time for conditioning was upon us.

If you remember from my mead making day, ten pounds of berries and stone fruits went into the bucket along with the honey, water, and yeast.  Because berry seeds are hard to separate from the finished mead (you can do it but you have to rack the mead multiple times), I used a fine mesh bad to hold the berries and hopefully to keep the seeds from becoming a clarifying issue in the future.

Mixed Berry Melomel Conditioning

To rack the mead to another carboy, I had to remove the bag full of the fruit from the bucket first, slowly so that it would drain out.  I didn’t want to throw out mead with the bag as they say.

From first impressions, the bag worked like a charm.  The number of seeds racked into the secondary vessel was minimal if any.  I fully recommend using a bag like this one to separate the unwanted stuff from your mead.

I had 4 ounces of American oak chips left over from my last mead adventure in my ingredients bin.  To prepare them for the conditioning phase, they were steamed on my stovetop for 15 minutes.

The plan is to let the oak get acquainted with the mead for a month.  The oak should marry well with the red and purple berry flavors.  The 71-B yeast does make mature wines quickly, which isexactly what the description said it would do.  The quick taste from the hydrometer sample had no hot flavors.

Once the oak conditioning is over, it will get racked to another vessel to let it clarify.  We see if that will be the only time I need to rack it or not.  I could always use bentonite to clear it up quickly but this time I didn’t want to add anything to it.

In a month, I should have a drinkable mead and should be just a few weeks away from bottling it.

2014 Cider Bottling and Tasting Notes

Cider is something that I (try to) make every year. The making part happens in the fall and the bottling part happens when I get around to it, usually in the late winter of the next year. It gets a little confusing for me since I put the actual year in the post titles but I will get over it with some effort.

This cider which I made back in October has been patiently conditioning for weeks. I was waiting until the cider looked clear in the carboy but when the calendar turned to March, I decided that the clarity was as good as I was going to get and it was time to bottle.

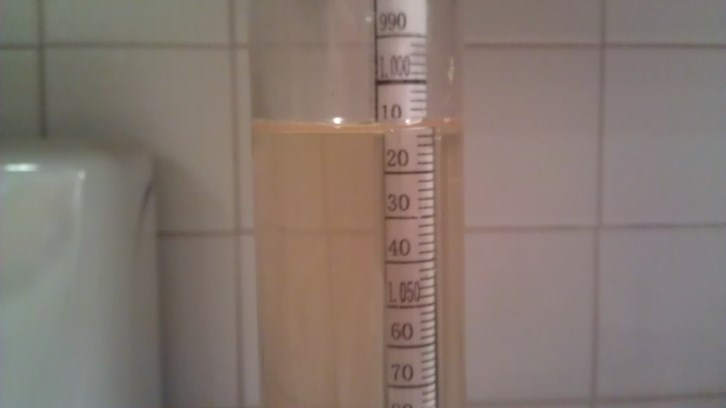
Interestingly enough, when I took samples to check on the gravity, the cider appeared very clear in smaller amounts. You will see a photo of the final gravity a little further down in this post.

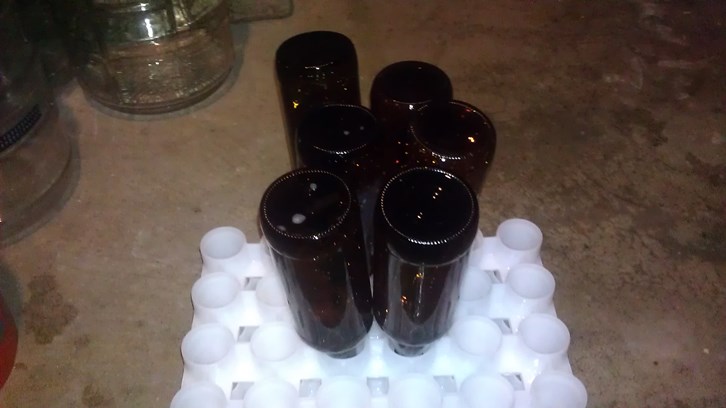
I mentioned getting equipment to best dry my bottles in an earlier post. Well, I got a couple of Fast Racks and I am pretty pleased with them so far. They are made of strong plastic and seem steady. With my 22 ounce bottles, they can handle 12 of them per rack. Since these racks are built to handle 24 twelve ounce bottles, I am pretty sure I can’t stack them. The bombers rest in alternating holes so there is no level surface on which the second rack can be placed. I’m ok with it – I may get a second drip tray but for you, it’s something to keep in mind if you are buying one and want to stack the racks for storage.

Here’s a photo of how I clumsily put some bombers in the tray for them to drain quickly after they were sanitized:

Fast Rack Drying Bottles

The bottling process went fine. I had nicely drained bottles and such. The two points of interest for you about this cider bottling were that I did add a little bit of table sugar to the batch along with some yeast to ensure I would have carbonated cider.

For the table sugar, I took a half cup right from the canister in my kitchen and boiled it in a pint of water for 15 minutes. At the same time, I proofed half a packet of Safale 05 in some 90 degree F water. These measurement were based on my prior experience. From my previous batches, this amount of sugar is suitable for a well carbonated cider. The yeast amount probably should have been measured but a half packet (~5 grams) of dry ale yeast can handle the added sugar, in my estimation.

The 05 yeast strain was chosen since I used an English ale strain for primary. I debated using a champagne yeast at bottling but I was afraid it would dry the cider out too much, especially when I saw the final gravity.

Final Gravity For Cider

A 1.010 reading is where an ale yeast gets you after primary. I bet you a champagne yeast, if added, would knock you down below 1.000 while it was working away in the bottle! Fearing bottle bombs, I added sugar and ale yeast, thanking you very much.

As for tasting, there is a flavor element that I think came from the raisins that I added to the secondary. It wasn’t unpleasant but certainly…different.

This cider, without me really planning it to be, became the experiment for understanding what raisins bring to the party when added to cider.

When it is fully carbed up and chilled, Mike and I will have a tasting video and discuss.

Cider On?!?

What is Top Mashing?

I brewed up a dry stout as my first brew session of 2014. I thought this would be the perfect time to try top mashing. The grain bill is very straight forward and only has one pound of roasted barley for specialty malt.

So what is top mashing?

Top Mashing is the process of adding grain late in the mash process to extract color and flavor after the main mash has finished converting. Normally, one would reserve grains that didn’t need to be mashed for this process.

Why perform a top mash?

The primary reason is mash chemistry. Great starch conversion is dependent on two things: temperature and mash pH. Temperature is pretty easy to control by the home brewer and easy to understand. However, pH can be difficult to understand, predict, and control. There has been a tremendous amount of chatter and debate lately about water chemistry and mash chemistry. Many people try and make predictions about what grain and how much they effect the pH of your wort. From those predictions, one can calculate different amounts of brewing salts (gypsum, carbonates, chlorides) required to put your pH back in check for optimum conversion.

Top mashing attempts to simplify this process by taking the very malts out of the mash that can have a dramatic pH lowering effect. Letting the base malt and a simpler mash chemistry do the work on the largest part of the grist…the base.

There are other debatable benefits of top mashing. Some may say that a smoother profile is capture by top mashing. Exposing certain malts to the heat of the mash for a shorter time may indeed extract less tannic or harsh flavors from them. Seeing how brewers have been mashing their entire grists for years without too much issue in this area, I don’t give this reason much credence.

What are the drawbacks of top mashing?

Primarily, it may take a bit more malt to get to the same color and flavor point than if the malts were in a mash for a full 60 minutes. In the video, I think that final stout wort is pretty black and I didn’t use more malt than I would have in a full mash scenario. I did crush the dark malts finely in anticipation of decreased ‘yield’. So beware and ‘your milage may vary’ with this technique.

This was the first time I had top mashed. We’ll see how it comes out when we taste it. However, both the un-hopped and post hopped wort tasted great with plenty of roast character.

Have you tried Top Mashing? Am I just crazy? Let us know in the comments section.

Page 142 of 322

Powered by WordPress & Theme by Anders Norén