
Brew Dudes

Homebrewing Blog and Resource

The hobby of homebrewing beer

Belgian Tripel Update

I brewed that Tripel up in what seems weeks ago (which it was).

I kept it comfortably fermenting at 68F for a week and a half.  When John and I (9/14/07) brewed up his Maple Porter I racked it over to secondary and checked the gravity with my hydrometer.  To my surprise despite having pitched a solid 1.5L starter and oxygenating the wort, my gravity was only 1030.  The taste was pretty good, definitely Belgian funky but not too much which is what I was hoping for.  However, it was still on the sweet side due to that 1030 gravity.  I moved the carboy to my basement where it was about 74F, figured since I still had plenty of yeast in the solution it would maybe start to ferment again at the higher temp.

It started bubbling again a day later.

Now more than two weeks later the yeast has settled and the bubbling is done.  I’ll be taking a gravity reading tomorrow night hopefully and see where it stands.

If that hasn’t lowered my gravity to 1015ish then I may try some champagne yeast and put it in bottles straight like that.  We’ll see where the gravity is tomorrow night and I’ll post my results and strategy from that evaluation.

Oh yeah, that reminds me that I promised John to rack his Maple Porter to secondary when I got back.  Beer chores and more beer chores…. such a demanding hobby.

Here is a picture of the beer with the blow off tube earlier during fermentation.  The second photo is of my partially complete log sheet for the Belgian Tripel.  It’s not the best quality photo but I’ll be putting together a separate post about my record keeping in the future and I’ll link a copy of the file then for anyone who wishes to use it or modify it.


Colorado Rocky Mountain High

Well I am back in action after a brief vacation in Colorado….So its time to get posting again.

For the record it wasn’t all fun you know.  I was pressed into some serious beer research.  I sampled several great brews that I don’t normally get at home. Just to name a few:

Full Sail Pale Ale
Moose Drool Brown Ale
Sweaty Betty Blonde Ale
Maple Nut Brown Ale
Odell’s Easy Street Wheat

Here’s a couple pics to help prove my point how difficult a trip it was:


See, it’s really tough to concentrate when the scenery is so damn distracting!

Brew on!

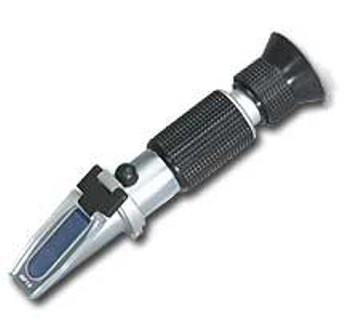
Refractometer

Another tool to measuring your brew’s specific gravity is a refractometer.  It can measure the amount of sugar in a liquid by the amount the liquid refracts light.

Fascinating stuff!

Refractometer

To measure your brew’s specific gravity, a small sample (a few drops) are placed on the triangle end of the refractometer. Once the sample has been placed on the tip, the cover is closed down. To take a reading, you take the round end and place it up to your eye. The triangle end is pointed towards a light source which allows the refraction to be captured and presented to the viewer through the eyepiece.

The refractormer measures specific gravity using the Brix scale, which can be converted to other units of measurement like the Balling Scale or Plato degrees.

It’s more expensive than a hydrometer, but it uses a much smaller sample…and it’s 10 times as cool.

Cleaning and Sanitizing for Homebrewing

I like to break things down into simple elements to help myself understand complex processes or concepts.  Breaking things down makes it easier to teach others, too.  The process to making great homebrew, which argubly can be as complex or as simple as you want it to be, can be broken down into three elements:

  • Keeping things clean
  • Executing sound brewing techniques
  • Controlling fermentation

The second elements is the one where the most fun can be had.  To me, brewing techniques includes many things such as recipe formulation, putting great equipment to use, creating a great bottling process, etc.

Controlling fermentation is less fun, but it’s still interesting trying to figure out how to keep your fermentation vessel at the right temperature so the yeast can do their thing.

I’ll write about these two elements later.  Today’s focus is on keeping things clean.  Cleaning and sanitizing your equipment for homebrewing is probably the most overlooked element of the three elements.  I don’t particularly get a kick out of it…but I understand that it plays a big part in making a good tasting beer.

I made a mistake once and I didn’t clean my bottles as well as I could have.   The brown ale I made tasted awful.  The beers that weren’t contaminated with whatever bacteria I didn’t properly get out of the bottle had a soapy aftertaste because I cleaned my bottles with dish soap and didn’t rinse them well.  Carelessness ruined a good brew.

I will never let that happen again…and hopefully I can make sure it doesn’t happen to you either.

Cleaning

When it comes to cleaning, I guess you could use regular old dish soap. The issue is in the rinsing. You have to rinse it well for it to be effective, and I had an issue with that. I didn’t rinse long enough.

I would suggest using a specialized cleaning solution. Powdered Brewery Wash or PBW is what I have used since that bad brew and I haven’t had any problem with it. You can use it without scrubbing but a little elbow grease here and there helps out.

Another cleaning solution that I haven’t used is Beer Line Cleaner or BLC but it’s specialized for brewing. If you have used this cleaning solution, share your experience by leaving a comment.

Sanitizing

After cleaning your equipment (basically anything that will come into contact with your beer), you will need to sanitize it. Sanitizing is the process of killing microorganisms on your brewing equipment (up to 99.9% of those in existance which is different than sterilization which is the process of killing 100% of them).

Mike swears by Star San. It’s an acid based sanitizer than needs no rinsing. One that I have used in the past is Iodophor and I have been happy with the results. If you follow the instructions on the package on how to use it, you should find success. Mike and I usually let things sit in sanitizer overnight, just to be extra sure. It’s probably overkill, but it works for us.

Brew Update – Maple Porter

The Maple Porter I brewed on September 14 is still in primary fermentation and will stay there until Saturday.  Usually I would keep a beer in the fermentation bucket for just a week, but because this one had such a high specific gravity after the boil I think the extra week will better for it.

Plus, Mike is away in Colorado this week and I can’t get to it since it’s locked away in his garage…so it’s not like I have a choice.

Page 316 of 322

Powered by WordPress & Theme by Anders Norén