Brew Dudes

Homebrewing Blog and Resource

The hobby of homebrewing beer

Ultra Hops

Ultra hops are one of those varieties that were bred in the ’80s and released in the ’90s. It fits into the Mt. Hood, Liberty, and Crystal hops family which seem to me to be the varieties that were bred to grow here in the States as noble hop replacements. They have noble hop flavor and aroma qualities without the susceptibilities to pests and disease as the true noble hop varieties have.

Ultra hops were originally bred in 1983 and released in 1995. They were bred from:

  • Hallertauer Mittelfrüh
  • Saaz
  • Unknown (my favorite)

Here’s more stats on Ultra hops:

Origin: USA

Aroma/Flavor: Descriptions include: spicy, floral, fine, mild

Alpha Acid: 4.5 – 5.0%

Typical Usage: Aroma

Beer Styles: Because it is bred from noble hop varieties, it works in styles that call for noble hops. I am thinking pilsners and American wheats.

Irish Red Ale Brew Day

Good brew morning to you…  The Irish Red Ale is in the fermenter and sitting in my coat closet off the living room.

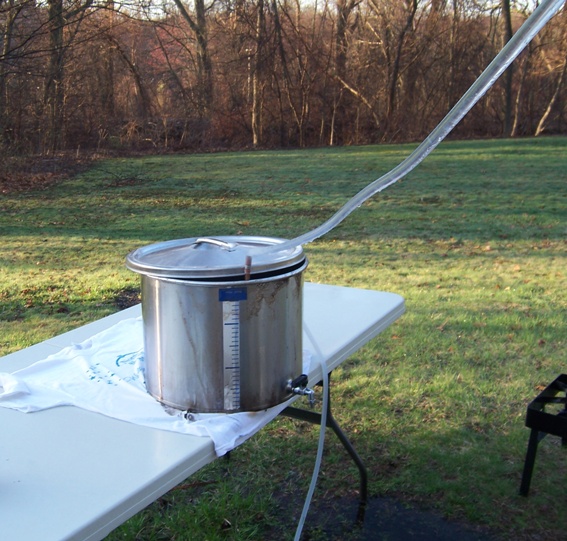
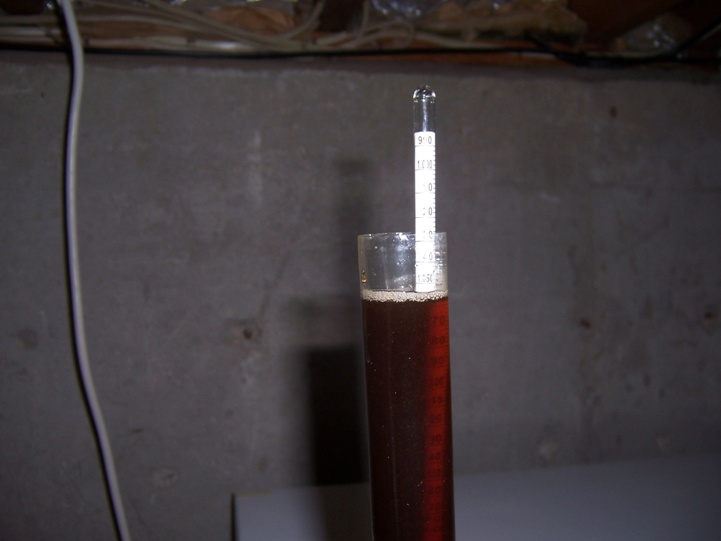
Here are some photos from the day:


Irish Red Ale Cooling Irish Red Ale Gravity Reading

Just some notes from the brew day:

  • I cold steeped the grains overnight so they were ready in the morning.  It appeared to work, I guess. It tasted the way I think it should have tasted.
  • During the boil, I could see the redness.  It was black ruby red so I am optimistic about the color.
  • Jamil’s recipes call for a 7 gallon boil.   I am on full boil over alert on every hop addition.  My 9 gallon kettle is just big enough to handle it.
  • I pitched just a 1 liter starter made with the WLP004 strain.  That stuff is clumpy…Cluuuuuuuhmpy.  I had to swirl for about 15 minutes just to get it all back into suspension.

Anyway, brew on.

Maibock First Tastings

Yeah, I rushed things a little bit.  The Maibock has only been in the bottle for 10 days, but I had to try it.  To tell you the truth, I was really happy that I did.

Even though the carbonation was low (to be expected), the taste of this beer was very promising.

The color was spot on….a few shades darker than straw.  The taste was balanced between malty and hoppy.

I served it kinda warm too, around 55° F, so it seemed a little sweeter than I expected.   Without more information, that’s what I am chalking it up to.

We’ll see.  With another week of conditioning at room temperature, it should carb up nicely.  Then I will chill the whole lot until I get thirsty again.

To retrace my steps, check out these posts:

Maibock Recipe

Maibock Style Profile

Maibock Brew Day

Whirlpool for Kettle Clearing

What is whirlpooling?

You may hear the term whirlpool in discussion by professional brewers and some homebrewers alike.

Whirlpooling is the process of getting the wort in the kettle spinning to generate centrifugal force.  Just like being a kid in a pool, once you get the wort spinning enough there is a density gradient created that forces any solids (hops and break material) towards the center of the kettle.

After the whirlpool slows down considerably, the wort can be slowly drawn out of the kettle from the edge where there is the least amount of kettle debris.  In some kettles, there may even be a diverter plate installed on the inner-most side of the valve opening to hold back kettle material as the flow of fluid tries to draw it into the draining valve.

What’s the benefit?  Clearer wort into the fermentor means less loss to cold-break material and yeast debris in the fermentor.  It can also be speculated that clearer wort at this stage improves the chances of clearer beer in the final package.

How do you do it at home?  When I finish my boil, I leave my stainless steel spoon in the kettle to keep it sanitary from the heat.  Then I start my chill with an immersion chiller that entered the wort 15 minutes before the boil ended.  As the wort chills, I can stir occasionally with the spoon.  This leads to more efficient contact of hot wort with the cold coils of the chiller, reducing chilling time.  After the wort reaches my chilled temp, I pull out the chiller.  Then with the still sanitary spoon in the fermentor, I start to stir in big circles.  This creates a very nice whirlpool.   I pull the spoon out and put a lid on the kettle to let it spin and slowly stop.  Generally, I let it rest for 20 minutes or so while I clean up and prep a fermentor and airlock.  When I am ready, draw the clear wort out of the kettle.

Another way that’s slightly more fancier is to use a brewing pump to create the whirlpool.  Pulling wort out of a valve at the base of the kettle, then reintroducing a 6-8 inches below the surface and parallel to the surface.  This creates a whirlpool using flow rate.  If you have the equipment and do this while using an immersion chiller, you get superior chiller-wort contact. (As reported by Jamil Zainasheff).

I hope that helps describe whirlpooling and its applications in clearing wort and chilling wort.

BREW ON!

Cold Steeping Specialty Grains

As part of out time saving tips post, I mentioned that cold steeping grains may help shave a little time off the brew day.  This post will address how I view you can use cold steeping for saving a little time on brew day.  This post will also address what advantages and disadvantages cold steeping poses in the normal brew process regardless of time saving efforts.

The origin of the cold steep arises from the potential acrid astringency that heavily roasted black malts can bring to a recipe.  Malts such as black patent, carafa III, roasted barley and the like are all kilned at very high temperatures essentially burning the husk and putting a deep roast into the starches and sugars within the grain kernel.  This can lead to an ashy flavor whenever you add too much of these grains to a recipe.  In an effort to get a really dark beer, it is easy to over do it.

The results of a cold steep for dark roasted malts are best exemplified in the schwarzbier style.  Schwarzbier at its simplest is like a black (close to opaque) looking pilsner.  The greatest examples of schwarzbier have practically no roasted flavor.  The black malts lend only color to the beer.  How do you achieve this at home?  Well, cold steeping was one technique developed to get there.

Cold steeping dark roasted malt tends to extract only color and very little flavor from black malts.  The cold temp tends to not allow some of the ashy flavors to come out of the husk.  There are other techniques and ingredients available to help get color without flavor (carafa special and sinimar) but cold steeping is cheap and works with the ingredients you’d have on hand for the a recipe anyway.
[On a side note: employing the cold steep for infusing coffee beans or cocoa nibs into your wort is a great technique; but a subject for another post.]

The advantages to the cold steep is the extraction of color and some malt flavors without much introduction of astringent or harsh burnt husk flavors when using black malt.  A disadvantage of the cold steep process is that when you are not including these malts with other base malt at normal steeping temps you do tend to introduce a little unconverted starch into your brew.  In the case of black beers this might not be a big issue.  Secondly, if you are keeping the grains to less that 5-10% of the total grain bill that contribution is negligible.

How does this equate to saving time?  When I used to extract brew, I used to set up my boil kettle on the burner filled with water the night before.  The next day all I had to do was fire up the burner and get going.  I would heat the water to ~150-160F. Kill the heat and add my steeping grains.  After 30 minutes, I’d pull the grains out, refire the burner and start adding extract when I got to ~180F.  Using cold steeping practiced, you can put your grain bags of crystal and roasted malts into the water the night before also.  The next morning, pull out the bags and fire up the kettle.  When you get to ~180F start adding your extracts and proceed as normal.

Now, I know what you are thinking.  Why not just put the bags in at starting temp, then heat the water with them in there?  You can do that, but I found in the past that I get slightly better flavoring and color (in terms of intensity) when either the grains sat in the 150F water for 30 minutes or were steeped overnight.  I never really seemed to get full impact when I did the “ramping-to-temp” steep and heat process.  The steep and heat process was how I first started brewing.  After scortching the bag to the bottom of a heating kettle a couple times I went to the heat then steep practice and liked the flavor much better.

So you may not think of this as a big time savings, but when you combine this with other time savings steps that we have outlined, I think it all begins to add up.
Hopefully, this primer on cold steeping helps you out whether as another way to craft some dark beers without astringent flavors, or maybe it helps trim a few more minutes out of the brew session.  Either way, let us know what you think.

BREW ON!

Page 238 of 322

Powered by WordPress & Theme by Anders Norén