Brew Dudes

Homebrewing Blog and Resource

The hobby of homebrewing beer

Brew in a Bag Commentary

When we first evaluated brew in a bag as a method we approached it from the eyes of an experienced all grain brewer that uses a traditional mash tun and sparge set up. After that video posted readers and. Viewers had some comments to add to our video and assessment. We decided to shoot another video to dig a little deeper into those responses and open our conversation a little wider regarding brew in a bag.

The one batch of brew in a bag that we’ve done so far was easy and straight forward. Both of us are looking forward to try it again. John has plans for some more small batch tests. While I am planning a couple full sized batches to compare to my normal method. All in all we are looking forward to brewing more beer. And tasting and trying them I video format as well.

Our first impressions for BIAB was that there may be now real time savings for us based in how we brew already. But we both admitted that might be an experience issue. Which is why we still plan to do a few more BIAB batches.

We made the comment before that brew in a bag, in our minds, could replace the partial mash technique entirely as brewers progress to all grain brewing. We should have been clearer in not dismissing BIAB as an all grain brewing technique in its own right. What we meant to focus on was that BIAB is so easy we could see people forgoing the tedious steps of doing a small mash and calculating the extract needed to complete a partial mash session. BIAB allows you to get right into all grain and leave extract behind with out much issue. Without much new equipment. Without much added skill sets. BIAB really is an easier way to get into mashing than partial mashing is. And for that reason we predict in the short long term it will trump partial mashing as the next progressive step in home brewing for many brewers.

Ultimately homebrewing for is about two things. Making good beer and having fun. If it isn’t those two things then why do it. Brew the way you want and don’t look back. In the end good beer is good beer and it doesn’t matter who brewed it or how or where it was brewed. Right?

BREW ON!
Red Wheat vs. White Wheat Tasting Notes

When we started playing with brew in a bag we wanted to use the technique to do some side by side experimentation. Our first experiment was to compare red vs. white wheat. Those beers are ready and we review our tasting notes in this weeks video!

Both of us felt that the red wheat was somewhat more robust. It had a slightly stronger grain character. It seemed more grainy, but not by much. The white wheat was slightly crisper maybe more softer on the edges of the palate range. The white wheat malt beer was slightly cloudier and seemed to retain its head a little better.

Both beers had a slight apple like note to it. Not a green apple acetaldehyde character, more of an apple juice or cider like quality. Some people reference a “tartness” when using wheat, perhaps this is where that idea comes from. John chalked this flavor profile up to being that thirst quenching character most people expect out of wheat based beers (albeit not at 100% wheat levels).

Both beers had a crisp mouthfeel. Mashed at 154F its interesting to note that the beers seemed very light almost as if they wort was produced at a lower mash temp range.

I think I was expecting more head. Really thick foam. Many brewers believe that adding a pound or two to a 5 gallon batch will help with head retention. These two beers seemed to have no more head than a standard barley malt beer. Further research into that I think is needed. Perhaps another round of wheat beers ranging in wheat percentage would be interesting. Say 100%, 75%, 50%, 25% and 10% wheat complimented by 2 row barley.

What’s the final take home here… I am not really sure. Red vs. White Wheat might get lost in a more complex beer like a dunkelwiesse. It might even get lost in a German or Belgian Style Wheat beers as the yeast character is the prominent feature. If I was trying to pick between the two for an American wheat summer beer I’d be hard pressed to maybe not use both split evenly. Taking the red wheat for its slightly more robust wheat like presence and using some white for its cleanliness and crisp character. Hard to say without more research.

And I guess that means its time for more brew in the bag sessions on our end.

BREW ON!

Harvest Lager Recipe

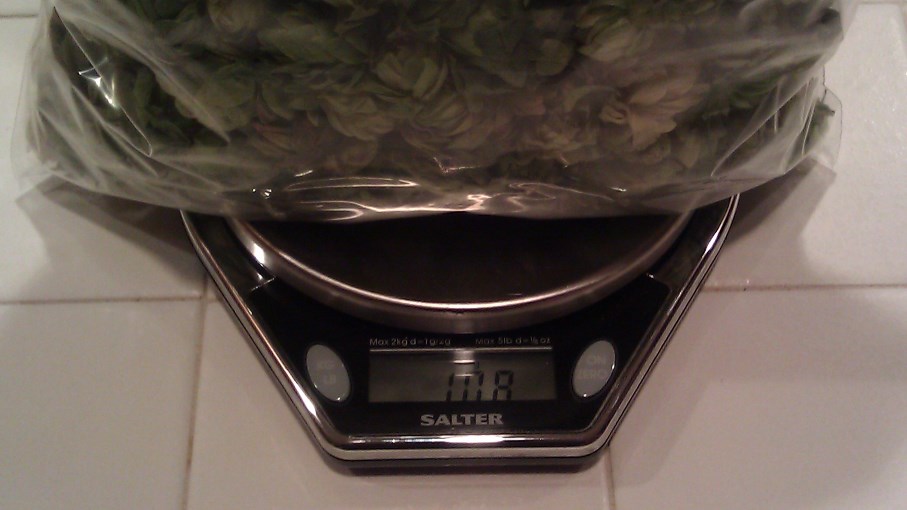
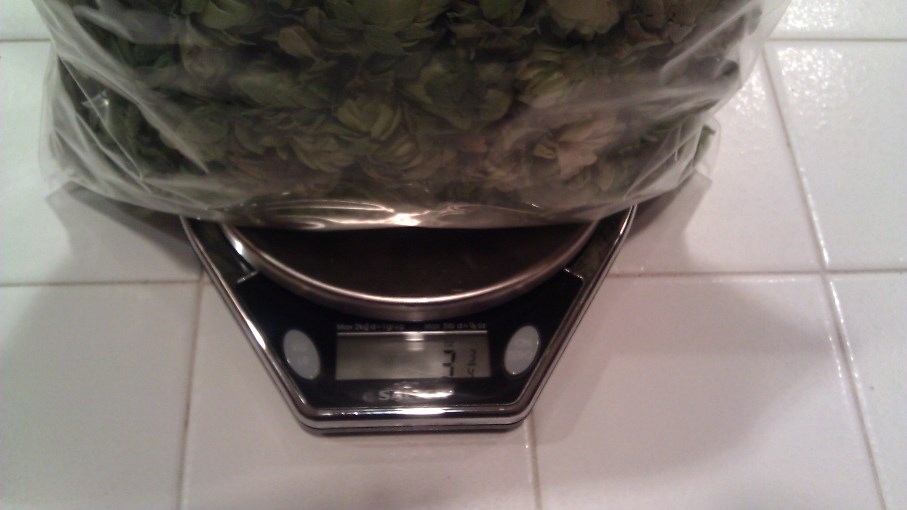
What do you do when you have nearly a pound of fresh, homegrown whole hop cones in your possession?  Well, you try to figure out how to brew with them.

These photos are of one of the bags at weigh in. I have three more just like it and more on the way:


I have brewed several beers with the hops I have grown in my back yard, both ales and lagers.  This year, I am going to try to brew a well hopped lager with a simple grain bill.

I am trying to showcase the hops this time around.  Since my harvest consists of German-like varieties (with a USA twist!), the idea of a Sam Adams Boston Lager clone came to mind. If this beer turns out the way I think it will, it should be hoppier than what you can get in stores.  A good portion of the cones will be used in a dry hopping, which I hope will bring out the aroma in the lager.

Ingredients:

10 lbs Pale Ale Malt
1 lbs 2-Row Caramel Malt 60°L
1 oz Magnum hops (%AA unknown)  boiled 60 mins.
1 oz Mt. Hood hops (%AA unknown)boiled 30 mins.
1 oz Mt. Hood hops (%AA unknown) boiled 10 mins.
1 oz Mt. Hood hops (%AA unknown) boiled 1 mins.
3 oz Mt. Hood hops (%AA unknown) dry hopped
Yeast :White Labs WLP830 German Lager

Predictions:

Original Gravity: 1.054
Terminal Gravity: 1.013
Color: 13.68 °SRM
Bitterness: No idea
Alcohol % by volume: 5.4%

Instructions:

Mash grains at 150°F for 60 minutes. Sparge and collect enough wort for a starting volume of 7.5 gallons. Those whole hop cones are going to absorb a lot of wort as the boil goes on so you will need to get as much as you kettle can handle. Watch for boilovers, naturally. Add the hops according to the schedule. Chill to 44°F and pitch your mighty yeast starter. Let the fermenter rise in temperature to 50° F and hold the beer there for at least two weeks. During that time, you will want to check on the fermentation activity. Once it is about to slow, add your hops for dry hopping. When fermentation activity appears to be done, take a gravity reading to ensure terminal gravity has been reached. Once that happens, rack to a clean carboy for some cold conditioning at refrigerator temperatures for a least a month. Bottle or keg as usual after the conditioning phase is over.

I will be brewing this soon since I want it to be done before Thanksgiving. Watch for updates and brew on.

Brew in a Bag Review

We brewed our first batch of beer using brew in a bag techniques!  I will say that it felt foreign and strange to only have one burner and one pot.  We also only brewed one gallon batches for our White vs. Red Wheat BIAB experiment, so that contributed to the not quite right feel of the day.  What follows is a summation of our impressions of brew in a bag.

Let me start with this caveat before the BIAB hate mail starts coming. Overall, I think we both enjoying trying new brewing techniques. Playing with something like brew in a bag helps put our regular practice of making beer in a different perspective. We will most certainly brew by BIAB again. Homebrewing should be fun first and everything else is second to that. If you LOVE brew in a bag you should do it. We make no qualms about what method is better, because its always been about fun. That said our first pass straight up impressions of brew in a bag were mixed.

First I think we were both expecting a faster brew day. Heating only one gallon of water, no sprage water, no mash tun to clean… Overall I think we spent 3-4 hours doing this. I can normally do a full 6 gallon brew session in about 4.5 hours if I push and I am well organized. So from that point of view, I was surprised.

Second, brewing in the bag wasn’t as straight up easy as I first thought. That lack of insulation in using the pot as a mash tun meant we had to add heat a couple times. I feared scorching the bag to the bottom of the pot so it meant holding the bag up while we applied heat. That was somewhat more labor intensive than a mix and stir approach of single infusion in an insulated mash tun.

We both recognized its sort of unfair to be so critical with it being our first time. (Like I said we will be trying this again. Hopefully several times.) We need more practice. Just like brewing with our normal setup.

Despite those detractors lets be honest. The brew session was indeed pretty straight forward. John and I shot the breeze during most of the process. Maybe that contributed to the slightly longer session that I anticipated! It was a beautiful late summer day when we brewed and that laid back summer aura sort of over took us.

The second big positive is that we certainly can conceive of other small batch ideas to throw your way. Doing small batches is really the strength of BIAB in our opinion. And small batches are really the greatest way to experiment with ingredients and with yeasts or process. We like BIAB very much for that purpose.

Our last take for a brew in the bag review involves brewer evolution. When I finally decided to take the plunge into mashing vs. using extract I did partial mash. Partial mash techniques have served as an ideal way to mash a little bit, but still use extract while you got over the anxiety of heating water and mixing in base malt (never really understood the trepidation that partial mash was supposed to over come for that reason).

I only did partial mash a handful of times because it seemed like a lot of work to still be producing a mostly extract beer. That’s when I went full all grain. John and I both agree that brew in a bag really lowers the barriers to going from extract to all grain. You don’t need more equipment. If you miss your mash temp you can add heat pretty easily as well.
We predict that brew in a bag could (and may) replace the partial mash concept entirely in just a few more short years. If it hasn’t happened all ready.

The best thing is that it keeps it easy. Keeps it fun and keeps brewers brewing. Isn’t that what its all about?

Let us know what you think.
BREW ON!

Home Grown Hops Harvest 2014

Year 5 of growing hops has proved to be a banner year for the harvest. My brother and I have finally have a yield that measures up to the ones I have read about online.

It didn’t start out that way. The death of my Cascade hops plant was a big setback, but we didn’t give up. The weather was great this summer and our experience helped to turn it around.

Magnum Hops Recap

This year was an experimental year for the Magnum hops. The first change going into this growing season was the elimination of the big tree that was near the plant and was used for the hops to climb up to their full height of 18 feet. Earlier, I wrote about the temporary trellis that I built for it, which worked ok but can be improved for next year.

The other change was my deliberate cutting back of the first shoots of the spring and allowing only 16 bines to grow to maturity. I have seen instructions on paper and online that say to cut the plant back. I don’t think I will do that again. Letting the plant grow as much as possible seems to work better than cutting it back. Now that I have tried both methods, I know what works.

I will probably get a couple of ounces from the Magnum plant. I am fine with that since they are a bittering hop and I don’t need that much to make a nice harvest ale. Next year will be a different story with an improved trellis and a live and let live strategy.

Mt. Hood Hops Recap

So this is the plant to brag about. My brother and I spent 2 hours picking cones last Saturday and I think we only harvested a third of them.

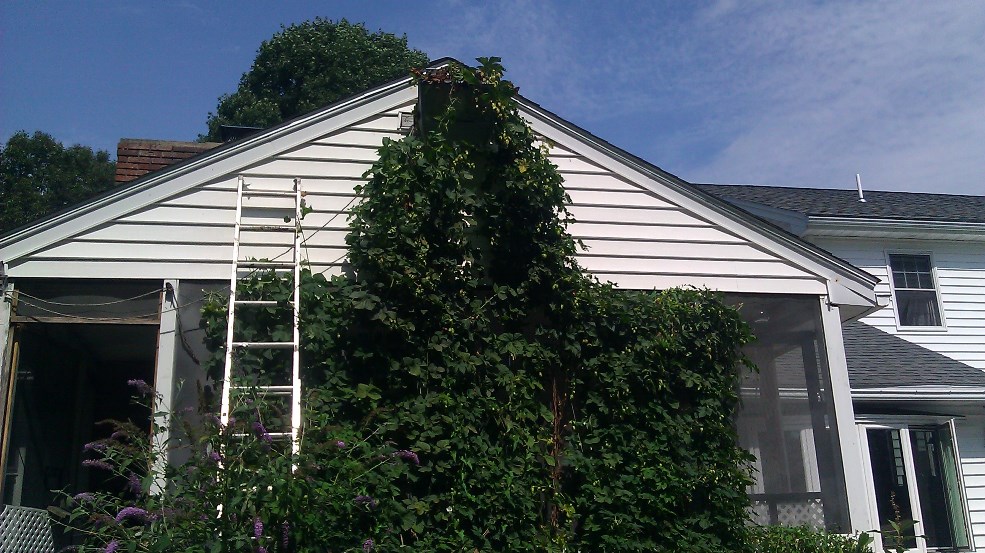
Take a look at the monster:

Hops Bines 2014

My brother watered this plant every other day for fifteen minutes. He had a soaker hose attached to a timer. People told me not to water hops plants that much. I have to say that is a silly notion. Every other day works excellently. He let all the bines reach maturity and most of them produced cones.

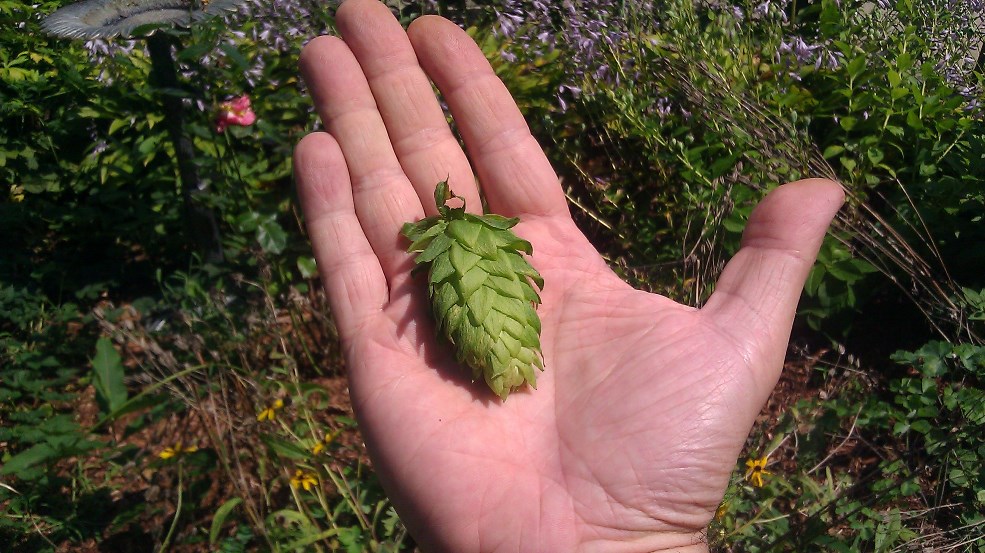
One of the cones was huge. Look how big it is in my hand:

Huge Hop Cone

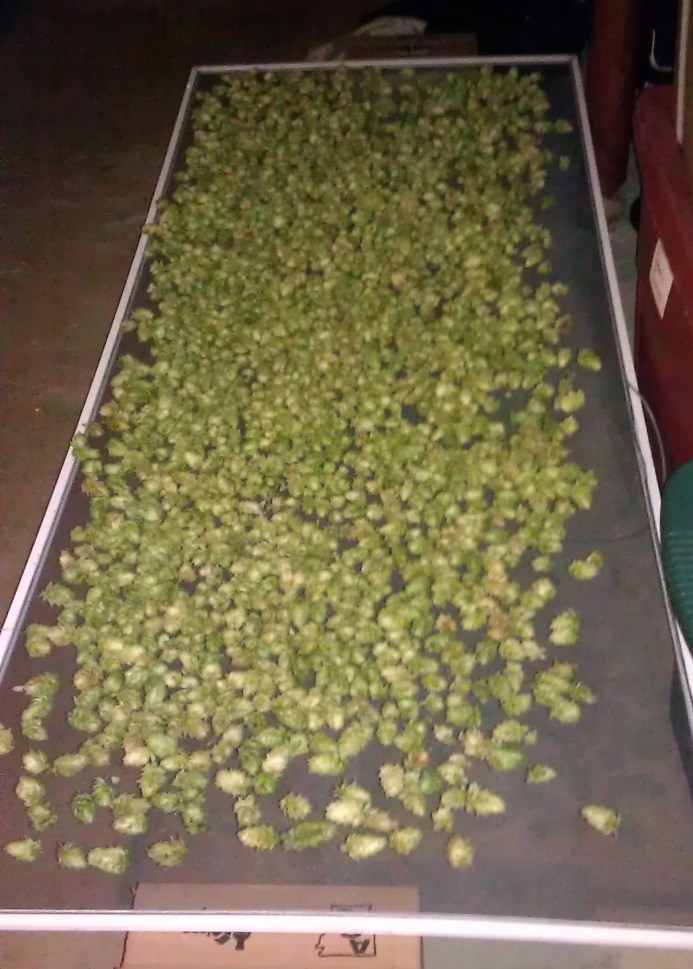
Again, we didn’t harvest them all in one afternoon. The paper bag that I brought over to collect the cones was halfway filled when I left. Spread out on a screen to dry, this is what they looked like:

Hop Cones Drying

Ok – so you too can grow hops at home. Find a sunny spot in your yard and keep these three thing in mind.

1. Let them grow. Don’t cut them back.
2. Water them every other day.
3. Give them enough rope to climb.

Believe me, you can do it too.

I hope to have a great harvest ale brewing in the next month or two.

Page 129 of 322

Powered by WordPress & Theme by Anders Norén