Brew Dudes

Homebrewing Blog and Resource

The hobby of homebrewing beer

Brew Stand Update #3

The last critical piece for completing the third burner on my brew stand came in the mail Tuesday afternoon! So I quickly finished up the last of the plumbing, did a little upgrade and the brew stand is ready!

Having the third and final burner done is a great relief. I was starting to worry and feel that I was focusing to much on HOW I was brewing rather that ACTUALLY brewing. To combat that front I took the stand in its two burner state and did a little test brew on Saturday morning. Just a quick and easy single infusion session. American Cream Ale was the recipe.

Overall I am happy with how thing felt. Nothing really changed with the technicals of the wort but it I quickly got comfortable with the idea of multiple vessels side by side. Although I will say one unexpected result of two pots firing up side by side was the amount of heat sneaking up in between them! Woo! I have to start to rethink safety a bit here now. Namely thinking twice before grabbing a metal spoon laid across the top of the pot.

You’ll notice in video and picture at the end that I did away with the water supply hoses for the gas hook ups. During a test fire of just the burners the amount of heat seems a bit high and I had fears of melting the supply lines in mid brew. So I switched to corrugated steel tubing. Should have done it right the first pass but was trying to be a bit cheap.

I didn’t mention it in the video but I also secured the black gas pipe with some zip ties. Makes the stand easier to pickup and move. I am still considering making the stand a bit taller. Perhaps I’ll mount into to the top of a small eight inch higher wooden cart with wheels. One, it’ll be easier to move a round. Two, it might be able to actually get the pump mounted underneath the stand. Again as it is now the heat coming off the burners and bouncing off the kettles would probably fry the pump too.

Overall it’s been a good project. Things left to do now is to put a valve on a third keg so I can have a proper HLT. I am contemplating a sight glass too to make water measurements easier. But for now I will focus on getting some beers brewed before I do more brewing. Focus on the WHAT and less on the HOW.

Please drop us a comment or ask any questions you might have.
Brew on!
White Beer Brewing Session

There are a few styles that I really want to brew right. Witbier is one that I have brew a few times and I have not been satisfied with any of my efforts.

Last Saturday, I gave it a try again. I bought a kit from Northern Brewer because it was there and it was an easy click to put in my online shopping cart. Unfortunately, I bought the wrong yeast so I had the awesome idea of cultivating yeast from commercial beers.

I bought three different versions of witbiers and made starters with the dregs of each. 2 of the 3 showed some activity so I used those two in my beer.

The kit itself had simple instructions. They were definitely written for the experienced homebrewer.
I am guessing since the recipe had oats in it, the mash included a protein rest. I had never done one before but I went ahead and held the mash at 122°F for 20 minutes before the 60 minutes at 152°F. No big deal.

More coriander and orange peel in this beer too. I write “more” because the saison kit I brewed had those ingredients in it too.

To keep the white beer cloudier for longer, I added a cup of wheat flour in the boil with fifteen minutes to go. I read this tip in a few different places so I felt it would help me get the look I want. In the past, my witbiers have cleared up way too quickly and it has affected my scores in competitions. We’ll see how that works out.

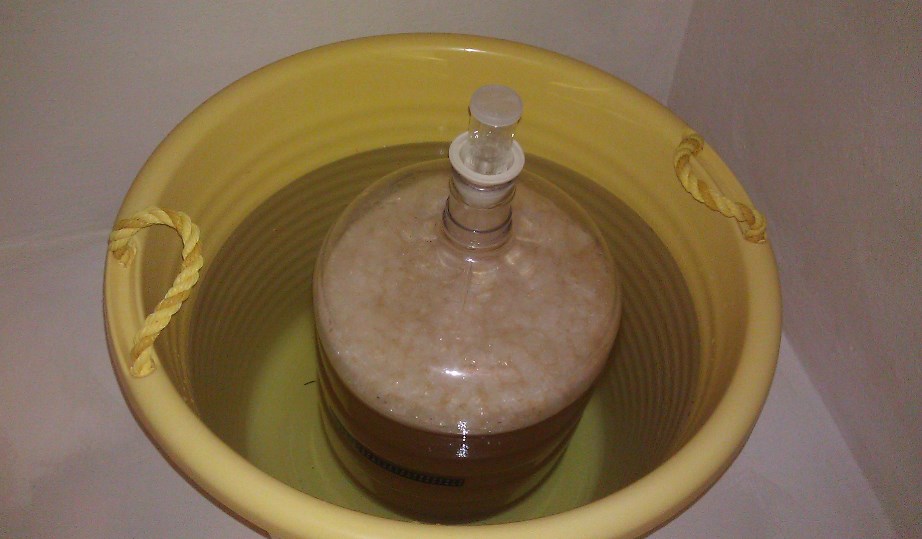
The big thing about white beers is keeping the fermentation temperatures cool so the funky flavors of the yeast don’t get too funky. Since it is still summer and the air temps are still warm in the house and outside, I put my fermentor in a water bath. This version of a swamp cooler should keep my carboy’s temperature in the 60 to 70°F. The cold water coming out of the tap is around 56°F so the vessel is well insulated here.

White Beer In A Swamp Cooler

I have some high hopes for this brew. If I can get that smooth, refreshing taste that I like so much in the commercial versions. Maybe some cultivated yeast is the way to go.

Brew Stand Update Two

Last week I shared the progress on the brew stand. This week I kept the momentum going and got the gas plumbing mostly done. The stand looks pretty good and the burners seem to fire with just as much power as a stand alone stand. I have two burners going for now, and the third will get down soon.

When I first conceived of building a brew stand I actually figured I would only employ two burners. As a batch sparge brewer this made perfect sense to me. I normally brewed with two individual stands side by side. However, when found the aquarium stand to start this project with, it just made sense to go to a three burner stand. Hence, the reason I only have two plumbed burners at the moment.

It took a bit of time at the parts department figuring out how I was going to plumb up the burner to the control valve, then the valve to the propane source. I’ll post the full parts list in a separate post for those folks interested in the details. The weakest part of the system is the use of water supply line to soft connect the gas manifold, in black pipe, to the valve and burner assembly. I works just fine. I am just unsure of the heat produced under the stand and worry wether the tubing will be able to take it. Having it melt and burst into flames in my garage is not an experience I am interested in having.

This concern stems from the short height of the stand. Because I cut the legs down to save on material its a little short in profile and the distance from the tubing to the burner is less than 12 inches. A test run to heat some water seemed to not create too much heat, but I am still concerned. I may switch over and hard plumb the line with copper tubing and flare fittings.

A second issue with the short height is that I definitely cannot mount my pump under the burners. The heat is too high and the room is just too tight. I figure I’ll get around that reality by just mounting the pump on a separate portable pump stand off some sort. That way I can easily move the pump around and put the stand away while still having the pump out to clean it. We’ll see how that idea develops after the first couple brew sessions.

That covers it. The next time I post about the stand I hope to be doing it during a brew session with all three burners in action. That leaves one last equipment upgrade, which is to build an HLT for that third burner! But that will be a new video.

BIAB Series Update

What do I have going on?

We have a preview of the Brewing in a Bag series.  The first of the experiments is ready to bottle and will be ready to drink and talk about in a couple of weeks.

These Brew Dudes took some video of the brew session and we plan to fuse it with some of our thoughts on the process with one of our future “in studio” tapings.

The new challenge for me is figuring out how much priming sugar to use for a 1 gallon brew.  I have to get my calculators out (yes multiple) and figure out how much I need.  I was thinking of getting a measurement by weight of what I need for a 5 gallon batch in grams and then figuring out a fifth of that for the one gallon batch.

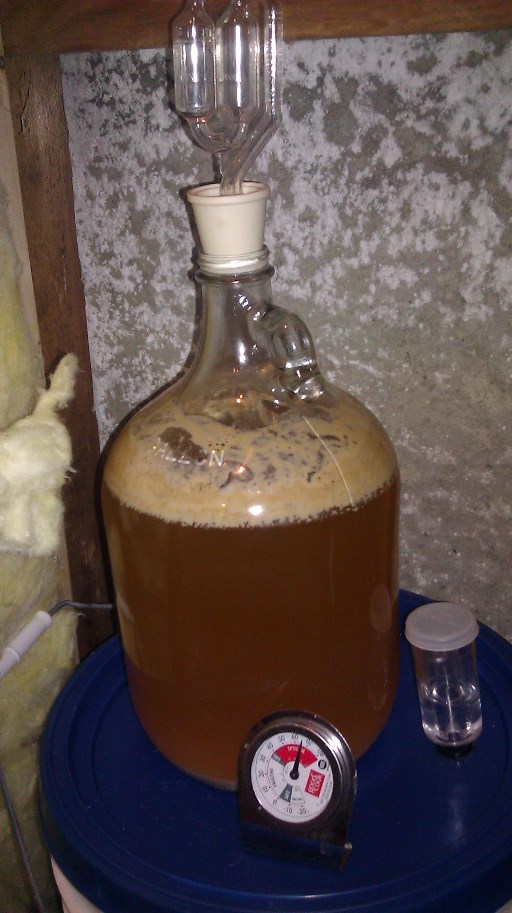
Two 1 gallon beers to bottle over the next few nights.  Love it.  Thankfully, I don’t need that many bottles.  Here a looky look at what the first gallon beer looks like:

White or Red Wheat One Gallon Batch

It’s the wheat experiment so if you’re interested in how the different wheats taste, well, we will have our opinions ready soon.

Mike is convinced that he has only used red wheat in his recipes throughout his brewing career. I am sure I have only used white wheat. That statement is apropos of nothing really, but it is interesting that we think we have only used one variety of wheat malt in our years of homebrewing.

More BIAB stuff will be coming. Outside of just our follow up notes on this experiment, I have three hop experiments to run. Now that I have the start of this test out of the way, I feel comfortable with the whole brewing in a bag process so the other experiments should be find.

That reminds me, if you are a reader of the Homebrew Talk blog, you can read about an experiment I conducted harvesting commercial yeasts for homebrewing.

Brew Stand Update

All the way back in January I announced that I was had acquired an old aquarium stand for a large tank. It looked like it would be perfect to become a brew stand. I posted a video about my plans and set forth thinking about how I wanted the stand to operate.

I can’t believe its been 8 months since originally posting that clip. I am happy to announce that progress has been made. In fact, the project is about halfway complete or maybe even a little bit closer than that.

The big decision came with shortening the height of the original aquarium stand to about half its height. I liked the idea of keeping it tall so that in the event I had a pump failure or clog, I could still go to a gravity feed system either into a bucket, kettle or fermentor. In the end I chose to chop the stand down to half its height, about 16 inches.

I chose to do this to primarily keep the brew stand closer to the ground. I felt like stirring the keg during mash in was going to be a bit of a pain with it so tall once the keg-mashtun was on top. The stand is also a little more narrower than I would have liked if I was fabricating something from scratch. So lowering the center of gravity a bit made me feel safer.

I expect I will eventually put some casters on it so I can wheel it around from a stored position to a brew in position. If I do that I’ll likely put some cross bracing along the bottom of the feet to help widen its stance a bit more. That will help improve stability. But for now it should work out fine.

The low height will still mean I am bending over to control the burners. But the burners I have chosen to work with sill stick out far enough that a control valve right on the burner will make it clear and easy which burner I want to manipulate. The low height also poses a bit of a dilemma for mounting my pump. I use a standard march pump for the recirculating mash tun and then I switch it over for use during a recirculating chill set up. I might need to mount a heat shield around the pump to protect it. But I’ll figure that out on the first run of the burners.

Lastly, A couple readers have asked about the number of pumps. I currently only foresee on pump in the short term. It works for me so far. I think I can rig up enough tubing and quick disconnects that I can pump from an HLT into the mash tun, and then changing tubing around to go from mash to kettle.

So all that’s left is to plumb in the gas lines. I plan to use rigid black pipe and T-fittings for to carry the propane. Then I’ll come up with a soft connection to go from the T’s to the control valves/orifices at the burners themselves. I was thinking I might be able to use stainless steel braided vinyl water supply lines for that part, but I am not sure. I like that they come in different lengths and some pretty short. They are also somewhat cheaper than the alternatives; copper and flare nuts or flexible gas lines with flare fittings. And advice there would be appreciated!

So that’s the update. Stay tuned. I am anxious to brew on it now so I hope to get to functional burners and possibly mounted pump within the next week or so. Wish me luck.

Cheers!

Page 130 of 322

Powered by WordPress & Theme by Anders Norén