Brew Dudes

Homebrewing Blog and Resource

The hobby of homebrewing beer

Brew Day – Maple Porter

Last night Mike and I brewed up my maple porter recipe.

Here is a photo of the half gallon maple syrup jug from Morse Farms:
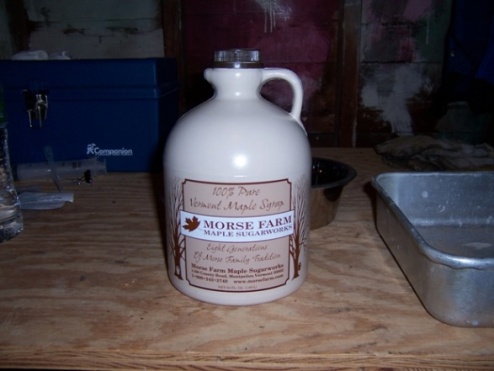
Morse Farm Maple Syrup

I told Mike that it tasted so hearty that it would put hair on your chest…and back. When I poured in the maple syrup, I stirred the brew so it wouldn’t scorch on the bottom. Unfortunately, the ring that held the cap on the jug fell into the pot and I didn’t notice until after I shut down the flame. Oops. Mmmm Plastic-y.

Here’s a photo of the wort chiller cooling down the brew for fermentation:
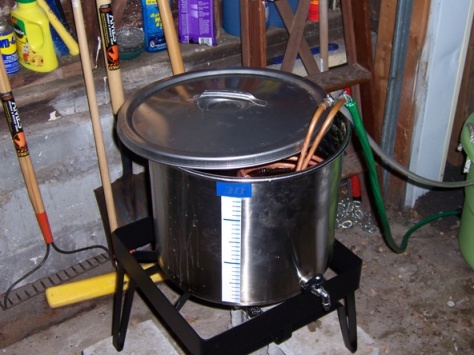
Brew Kettle Cooling

After the boil was done, we took a measurement of the sugar content of the wort known as the specific or in this case the starting gravity. Mike has a refractometer so it made this measurement very easy. My starting gravity was a little higher than I thought it was going to be. I got a reading on 1.080. Water has a starting gravity of 1.000. Most beers have starting gravities in the 1.040 range. It’s gonna be a big beer in terms of alcohol content if my yeast do their thing correctly.

I did make a yeast starter the night before. I boiled 4 ounces (by weight) of dry malt extract in 48 ounces (by volume) of water for 15 minutes. I let it cool to around 70 degrees and I pitched my British Ale yeast into my large, growler sized bottle.

I pitched the whole bottle when we got the wort to 75 degrees…so I am hoping that I have a large enough yeast army to attack this maple porter.
Racking Cane

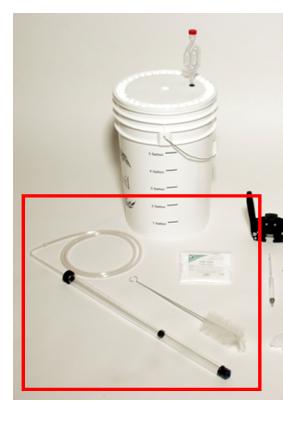
Here’s an item you may have never seen before. Well, you may have seen plastic tubing before…but maybe not the long clear plastic cylinder with the black rubber and plastic components on it.

Racking Cane

The item that is enclosed with the red rectangle is a racking cane. It’s a tool that allows you to transfer your beer from one vessel to another. Mostly likely as a beginner, you will use the racking cane to transfer your beer from the fermenting bucket to the bottling bucket. As you get more experienced and you buy more equipment, you may use it to move your beer to a secondary fermentation vessel or into a keg.

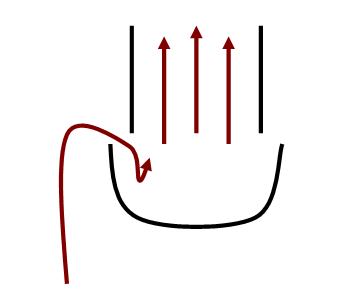
The cane part (the cylinder) generally hooks on the top of your bucket. The end of the cane has a rubber tip that allows beer in enter the cane indirectly. Here is my really crude drawing of how beer flows up the ranking cane tip.

Beer Flow

With this tip, the possibility that the yeast sludge that has settled on the bottom of the bucket won’t get sucked through the cane and into wherever you are sending the beer.

This kit’s racking cane actually has an auto siphon on it. It allows you to start a siphon without having to start one with…your mouth…which isn’t really optimal. To work the auto siphon, you would push on the plunger on top of the cane to force air out of the bottom. When you pull up on the plunger, beer gets pulled in and your siphon should start. Pretty sweet!

Here are some other articles for homebrewing beginners:

Fermentation Bucket

Let’s get back to the items in the beginner brewing kit and discuss the fermentation bucket.

Fermentation Bucket

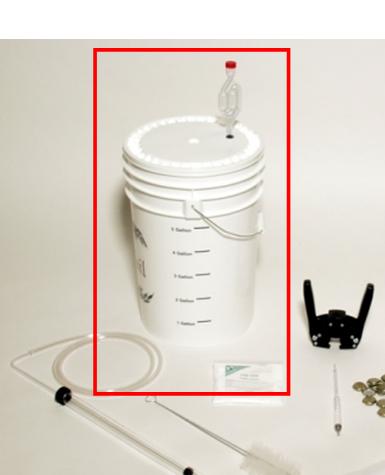
The white bucket that’s highlighted with the red rectangle is the fermentation bucket. Once you are done boiling your wort in your brew pot, it gets poured into this bucket for the fermentation process….hence the name.

These buckets are made of food grade plastic, which means it’s plastic that has nothing in it like dyes that are harmful to people. A beginning brewer should keep in mind that if he or she uses the bucket to store things like chemicals or other nasty things that are harmful to people, then the bucket is no longer food grade. So, to be safe, only use your fermentation bucket to ferment beer, and not to mix oil-based paint.

Buckets you get in a kit can hold at least 6 gallons of liquid, so you will have plenty of room to brew a 5 gallon batch of beer.

It comes with a cover that seals tight on top with a hole to insert an airlock (That’s the funny squiggly plastic thing on top of the bucket with the red cap in the picture). The airlock is an important piece of the fermentation bucket, since it allows carbon dioxide to escape but keeps the outside air out.

If you didn’t have an airlock, then you would run the risk of air getting into the fermenting beer through the little hole in the cover…which can bring in wild, weird yeast into the mix and result in off flavors.

If you didn’t have an airlock and the cover didn’t have a hole in it, all the carbon dioxide the yeast produce during fermentation would build up and you would have…yeah…a beer bomb. BOOM!

There are a few different styles of airlocks, which will be discussed in a later post.

There are other types of fermentation vessels, but for the beginner the bucket works just fine.

Here are some other articles for homebrewing beginners:

Beginner Brew Pot

I know yesterday’s post discussed a starter brewing kit and did imply that I would write about the different items in the kit, but I think I want to stop myself before I get waaaaaaaaay ahead.   There is  a very important piece of equipment all beginning homebrewers need to have: A brew pot.

Every brewer, not matter the experience level, needs a brew pot.  You need a pot to boil your malts and hops to make your beer.

You could buy a brew pot from a homebrewing supply store right off the bat, but it’s not a requirement…like the kit is.  Most people have a large stock pot in their kitchens that can be used for homebrewing.  If you are just starting out, my opinion is that you shouldn’t have to invest any more than is absolutely necessary.  Believe me,  it can get expensive.

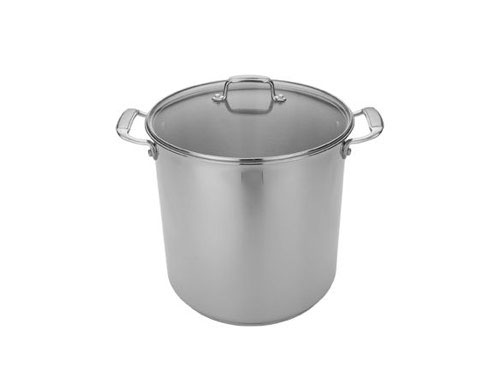
Most beginner homebrew recipes only require you to boil an amount of 1 to 2 gallons at the most.  When I started, I was only brewing a gallon and a half of wort so I only needed an 8 quart pot.  If you have a larger one, that’s fine.  The picture below depicts a 22 quart pot.

Stock Pot for Brewing

I don’t think you need one this big to start, but do whatever you want. It’s your money.
I would stick with stainless steel and one with handles that makes it easy to move.

Tomorrow, we’ll talk fermenting buckets!

Here are some other articles for homebrewing beginners:

Beginner’s Guide To Homebrewing Beer

Since we started this blog, Mike and I have been publishing posts around subjects that are familiar to us and our experience levels.  Mike’s certainly pretty advanced and I know just enough to be dangerous, but I think I need to put up some posts that speak to the beginner and would-like-to-be-a-beginner-but-I-don’t-know-where-to-start readers.

The next series of posts will be for the people who have an appreciation for homebrewed beer but haven’t taken the time to learn about how to brew at home.

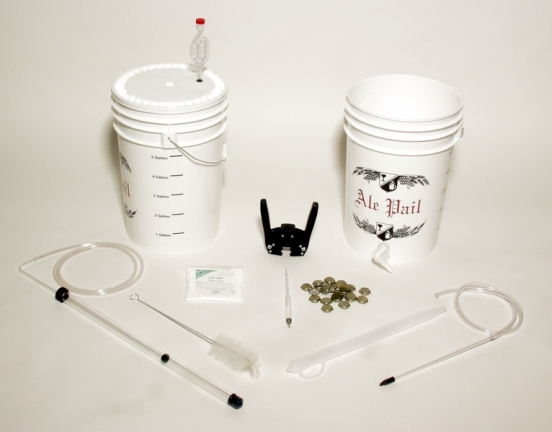
In my opinion, the first step you need to take before becoming a homebrewer is to buy a beginner’s homebrewing kit.  The photo below depicts what said kit looks like:

Beginner Beer Brewing Kit

 I got this photo from NorthernBrewer.com, a homebrew shop based in St. Paul, MN.  You can see that there are a couple of buckets, some tubing, bottle caps, and some things that you may have never seen before…which might be kinda scary…but they aren’t.

Starting tomorrow and over the next few days, I will go into detail what each of these items are and what they are used for.

If you want to get a head start, visit these sites where you can purchase a kit right away.

You can get the kit pictured above by visiting the Northern Brewer.

When I got started, I bought my kit by ordering from selecting this kit from
Beer-Wine.com.

There’s a new brewing supply store in MA and you can buy a kit by visiting DIY Brewing.

Here are links to other beginner articles:

Page 318 of 322

Powered by WordPress & Theme by Anders Norén