Brew Dudes

Homebrewing Blog and Resource

The hobby of homebrewing beer

Homegrown Hops 2013

The end of winter to us is when the homegrown hops start to shoot out of the ground. The Magnum hop plant is my most mature one.  It is entering its fourth year of growth.

Homegrown Magnum Hops Home Grown Magnum Hop Plants Homegrown Magnum hop bines

Last year, they started to shoot through the ground on March 1st. This year, an early April is more ordinary and more welcome. Now I have to figure out how I am going to cut back on some of these shoots.

My 2012 experiment to leave them alone didn’t produce as many hop cones as the previous years. I will be cutting back this year – just don’t know which ones.

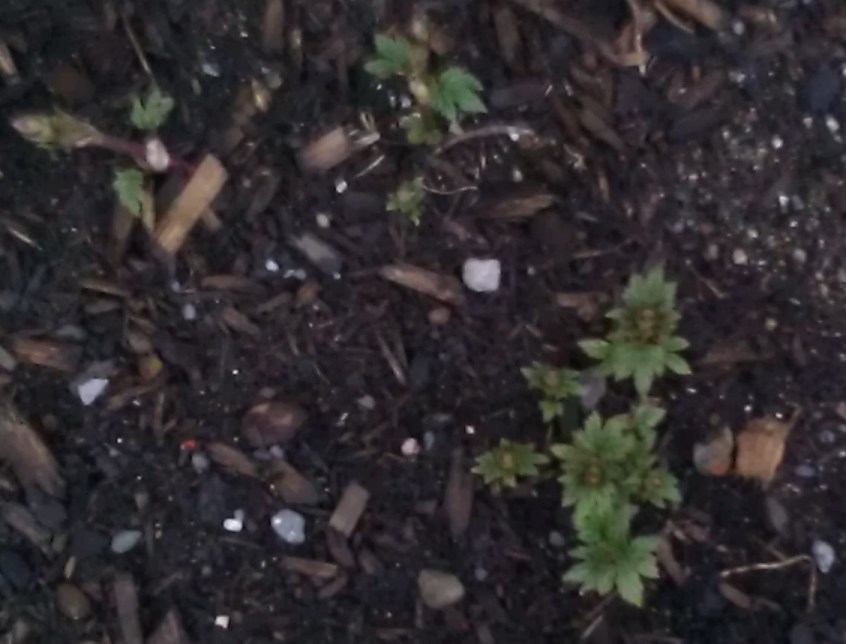
My Cascade hop bines are starting to sprout too. They are in their second year of growth and I am hoping to get some cones out of them this year.
Homegrown Cascade Hops

They look healthy so far – not as robust as the Magnum plant but strong for year two. I wish I could say the same for the Willamette hop plant. I don’t see anything from its plot yet.

I love growing hops and I love brewing with the cones at harvest time. I know great number of brewers will tell you about the unpredictability of homegrown hops in terms of alpha acids and you can’t expect to brew excellent beers with them.

I can type this fact with all the honesty I can muster: two of the beers I have brewed with homegrown hops have placed in competition. Were they hop focused styles? No. One was a blonde and one was an alt but they both tasted fantastic. If you know how to use your homegrown hops based on what the style calls for and where the hops are needed in the boil, you should have no problems brewing great beers with hops you grow in your backyard.

Corny Kegs

This post showcases the second video in our series of transitioning from bottling homebrew to kegging.

In this video,  I discuss the components of Cornelius kegs (also known as corney kegs or corny kegs or soda kegs). They are a major piece of equipment you need to buy. Corny kegs, which were made for sodas, work well for homebrewers since they typically hold 5 gallons, are easy to clean and sanitize, and their size and shape is conducive to easy storing in a refrigerator.

Things you need to know about:

  • New vs. Used
  • Where gas goes in and where beer comes out
  • Parts that you may need to replace
  • The difference between ball locks and pin locks
  • What the bend on the dip tube is for

There are two kinds of corny kegs – ones with pin lock connectors (made by Coca Cola) and ones with ball lock connectors (made by Pepsi). Both can be used for homebrew but they are not interchangable. I usually see ball lock corny kegs for sale.

Now you can buy new ones but if you want to save some money, you can find refurbished ones that work just as well as new. I have seen homebrew stores sell both new and used corny kegs. You can find corny kegs for sale on Craigslist too. If you see a restaurant that has gone out of business, you may be able to get corny kegs from there.

One last thing about corny kegs – I have seen new 2.5 gallon corny kegs and they are just a little less expensive than new 5 gallon ones. To me, the price doesn’t justify the halved amount of volume. You’re probably better off getting a 5 gallon one if you are starting your kegging homebrew journey.

Getting to know the parts of a corny keg and how they all fit together takes us one step closer to filling it with beer and getting it in the fridge.

In the next video, I will go through details about carbon dioxide tanks and regulators.  Hopefully each of these videos will help you to buy kegging equipment without any issues.

Brew On!

More Kegging Homebrew Videos:

Video 1 – Introduction To Kegging Homebrew

Video 3 – Learn Something About CO2 Tanks and Regulators

Video 4 – Guide to Keg Faucets and Towers

Video 5 – Balancing You Kegging System

Video 6 – Hombrew Kegging Tips

Lagering Too Long

The maibock that I brewed as part of the Midwest Supplies Kit Review was bottled a couple of days ago.  I brewed it on a cold January night with snow on the ground and a soul crushing chill in the air.

Weather like that is good for one thing – chilling your wort to lager fermentation temperature without much effort using an immersion chiller.  Other than that, it’s pretty tough brewing outside.

With a target drinking time of next month (May), getting it into the bottle now was imperative.  I tried making time to bottle it sooner but for one reason or the other, I didn’t get the time to do it.  So the carboy sat in my fridge and the proteins and the yeast settled to the bottom and the beer cleared.

For nearly 12 weeks, the beer stayed in my fridge to condition and clarify.  It sat there silently, waiting for the day that it made it into bottle with some priming sugar to carbonate naturally.

I have to say because of the long lagering time, the beer was very clear.  The basement light shined right through it as I lifted it from the fridge.

I usually lager beers for no more than 8 weeks.  I tend to get impatient and my usual bottling time after lagering is six weeks.  So to go for nearly 12 weeks was making me feel like I was breaking my own rule.

I don’t think lagering for almost 3 months is going to be detrimental, but it did get me to thinking.

How long is too long to lager a beer?

At what point do you have to start thinking about reintroducing yeast to the beer if you are going to carbonate it in bottles?

What was the longest lagering time that you did for a beer?  What were the results?  Let us know by leaving a comment below.

Brew On.

Aramis Hops

There aren’t many French hop varieties that I know of. I am not sure how many varieties from France are available here in the States, so it was interesting to see information about another French variety: Aramis Hops.

This variety is bred from Strisselspalt hops, which makes sense since it’s the other French variety I know of, and the English Whitbread Golding Variety (WGV).

Since these hops are particularly new (the first commercial beer I saw brewed with them was released in 2011), there isn’t too much information about them. This variety may be a good one to experiment with.

Origin: France – specifically the Cophoudal company in Alsace, France in 2002. Their parent company is Comptoir Agricole, an agricultural group.  It looks like they are starting to breed a number of new varieties there, which we will probably need to cover in other posts. The Alsace region of France borders Germany and most of the hops grown in the country are grown there.

Aroma: Earthy, woody, floral – Hints of lemongrass, hay, maybe Earl Grey tea.

Alpha Acid: 7.9-8.3 %

Typical Usage: Can be used in all stages of brewing, but I think this would be a good flavor/aroma hop

Beer Styles: Thinking Belgian styles – saison, Belgian Tripel.  I think it might make an interesting IPA.

A commercial beer that uses Aramis hops is the collaboration Baird/Ishii/Stone Japanese Green Tea IPA. Pick up some and taste for a preview of this variety.

Kegging Homebrew

We did a few posts over a year ago talking about getting started in kegging your homebrew. We talked about walking through all the components one part at a time. Unfortunately, that project never really got off the ground and into the blog. However, have no fear. If you can’t write it, you can make videos about it!

Here is the first post in a series that will carry us through April and likely into May. All about the parts and processes, ins and outs of getting your beer out of bottles and into a draft system. (Actually, I bet you’d really like to see how to get beer from kegs and into bottles! Patience, grasshopper.)

With the transition to kegging homebrew, we thought it made sense to think of the final destination of the process first.   Before you buy a keg, you should figure out where you will be storing those kegs to keep them cold and to serve your beer.

Mike describes in the video the two main options for storing and serving your homebrew.  You can build a keezer like he did or fit a refrigerator with taps.

By thinking about this final set up, it will help you to buy some of the most critical pieces of the transition from bottling your homebrew to kegging it.

Watch this introduction video and come back for the other videos in the kegging homebrew series.

BREW ON!

More Kegging Homebrew Videos:

Video 2 – Everything You Wanted To Know About Corny Kegs

Video 3 – Learn Something About CO2 Tanks and Regulators

Video 4 – Guide to Keg Faucets and Towers

Video 5 – Balancing You Kegging System

Video 6 – Hombrew Kegging Tips

Page 169 of 322

Powered by WordPress & Theme by Anders Norén