Brew Dudes

Homebrewing Blog and Resource

The hobby of homebrewing beer

Kazbek Hops

The Czech Republic has been breeding and releasing new hop varieties over the past 20 years. No longer is Saaz the only variety cultivated in the country. In 1994, new varieties have been made available and many of them were derived from the Saaz hop.

One of those varieties is Kazbek hops. The heritage of Kazbek includes Saaz and wild hops from the Caucasus Mountains. Some sources said they were related to Cascade hops but I couldn’t find anything conclusive to support that notion.

Here are more details of Kazbek hops:

Origin: Czech Republic – Registered in 2008 and released in 2009

Aroma: Spicy like Saaz but more so. Also earthy and wild. Saaz with a little more kick?

Alpha Acid: 5.0 – 8.0%

Typical Usage: Flavor / Aroma hop

Beer Styles: Pilsners, Lagers, Belgian Ales

There are a few other Czech varieties that I would like to check out for their spiciness. This summer, I think there is going to be a Saison throwdown of some sort and I am looking for varieties that will add to the spiciness of the beer. You get a lot of spicy flavors from the yeast especially with the warm fermentation temperatures. Rather than add black pepper or other spices to the recipe, I want to get as much flavor as I can out of the typical beer ingredients. New hop varieties can help in this quest.

If you are looking to buy these hops, there are a few homebrew shops that have them available at posting. There are commercial beers being brewed with these hops as well. Seek them out to get a sense of how they will perform in your beer.
Kasbek Hops

Faucets and Towers

Part four of our Kegging Homebrew video series, Faucets and Towers.

For this video its a quick chat about the ins and outs of faucets.  I use rear sealing faucets but I make a case for why you might want to consider using forward sealing faucets, like Perlicks.

Those faucets come at a slightly higher price tag, but perhaps slightly less maintenance.

I use a wooden collar to mount my faucets because it is pretty straight forward and easy to do.  There’s no worrying about drilling through refrigerant lines or putting permanent holes in the fridge itself.  I think using a collar set up with a chest freezer makes access to the kegs and the lines and tank much easier.

While I haven’t done anything special to the wood of my collar yet, you can always paint it, stain it or dress it up somehow.

Lastly, a lot of people dream of multi-faucet towers with their kegerator.  I had priced several out when thinking about draft beer years ago. In the end, a tower can create issues with dispensing. The beer lines Need to stay cool to keep the beer from foaming up.  Draft towers will need to get heavily insulated, or have a coolant line running up through it, or a fan to circulate cold air out of the freezer and into the tower.

For me it would be a large amount of extra maintenance for something that sits in my garage and only really gets seen by my buddies. Besides, people tend to forget what the kegerator looks like after they get to pour their own beer out of it.

Enjoy this slightly short video as compared to the previous two:

If you have questions we haven’t covered, or things you think we skipped over; let us know.  We have one more video coming up in the series and after that we can do one more to recap and answer questions about kegging.

BREW ON!

More Kegging Homebrew Videos:

Video 1 – Introduction To Kegging Homebrew

Video 2 – Everything You Wanted To Know About Corny Kegs

Video 3 – Learn Something About CO2 Tanks and Regulators

Video 5 – Balancing You Kegging System

Video 6 – Hombrew Kegging Tips

German Pilsner Recipe

If you want to brew a German pilsner, here is my recipe for this beer style. After brewing a Bohemian pilsner last year, it’s time to brew another pilsner for summer and try to improve on my process.

The improvements I am looking to accomplish with this beer are getting better clarity in the finished beer and getting a more pronounced noble hop aroma. I think with the water chemistry information we will have with our water (our tap water is really soft), I can dial in the sulfate additions to get my water profile to better match the water used in the style.

Here is the recipe:

Ingredients

10.5 lbs Pilsner Malt
0.5 oz Magnum Pellets at 14.5 %AA boiled 60 mins.
0.5 oz Hallertauer Mittelfrüher Pellets, 4.5 %AA boiled 15 min.
0.5 oz Hallertauer Mittelfrüher Pellets, 4.5 %AA boiled 1 min.
Yeast: White Labs WLP800 Pilsner Lager

Predictions

Original Gravity: 1.047
Terminal Gravity: 1.010
Color: 3.91 °SRM
Bitterness: 37.4 IBUs
Alcohol (%volume): 4.8%

Instructions

I want to get this beer to be as dry as I can get it. The final or terminal gravity is a soft goal. If I can get it a few points under 1.010, I will be happy. To do that, I am going to mash the grain at 147° F (64° C) to get as fermentable a wort as possible. Because of the low temp, I will mash for 90 minutes to ensure a full conversion. Then, I’ll sparge until I get 7 gallons of wort for a 90 minute boil to get 5.5 gallons into the fermentor.

After fermenting at 50° F (10° C) for two weeks, rack into a secondary carboy and lager for a month or so at near freezing temperatures. Bottle or keg as usual.

The end goal should be a light colored but nicely hopped beer with some distinct floral aroma coming from the Hallertau pellets. With the late hop additions and the water treatment, it should work out well.

CO2 Tanks and Regulators

We finally start to look inside the kegorator in part 3 of our kegging your homebrew video series. In this video, I cover the CO2 tank and how it works in conjunction with the CO2 regulator. Also, I discuss why I have a cage to protect the regulator’s gauges.

From the regulator, we discuss using a gas manifold to split the CO2 from the main line off the regulator into your different kegs. I have four serving lines so I use a four way manifold.

On that manifold, I discuss the value of check valves to protect your gas lines, regulator and tank from potential “back flows” of beer up into your lines. A manifold also helps minimize gas leaks in between serving sessions of beer. A leak in one keg with a wide open manifold will slowly drain all your kegs of gas and carbonation.

I talk about an alternative CO2 source for when you want to take a keg on the road.

Plus, I go over the importance of investing in a second CO2 tank to safeguard the tragedy of running out of gas in the middle of a party.

Lastly, I point out an issue I can never stress enough. Buying a kegging system is a pretty big investment and a fun one for sure. But before you chose that shiny new system from the brew shop, you need to consider where you’ll get your CO2 from. In my area I couldn’t find a place to fill my brand new tank, so I had to opt into a swap system with my local provider.

Check out the video for all the details.

Leave a comment if you have questions or just want to let us know how we’re doing. Hopefully you are getting some useful information about kegging your hombrew.

BREW ON!

More Kegging Homebrew Videos:

Video 1 – Introduction To Kegging Homebrew

Video 2 – Everything You Wanted To Know About Corny Kegs

Video 4 – Guide to Keg Faucets and Towers

Video 5 – Balancing You Kegging System

Video 6 – Hombrew Kegging Tips

Mead Flavor Experiments

With 5 gallons of a medium show mead to play with, I racked a couple of gallons to smaller containers for some mead flavor experiments.  Fermentation had slowed down considerably after 3 weeks.   I thought it would only go 2 weeks but the airlock was pretty active.

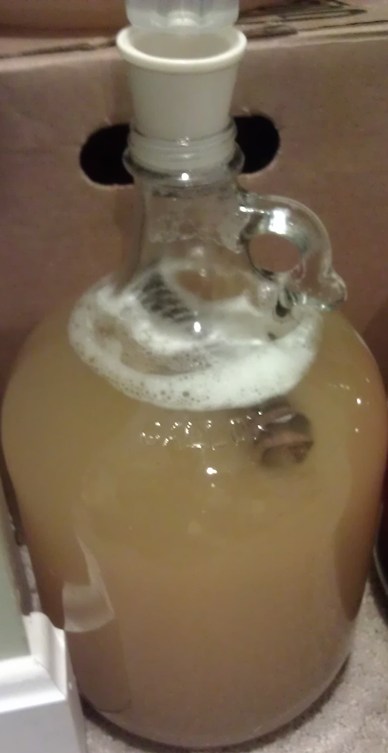
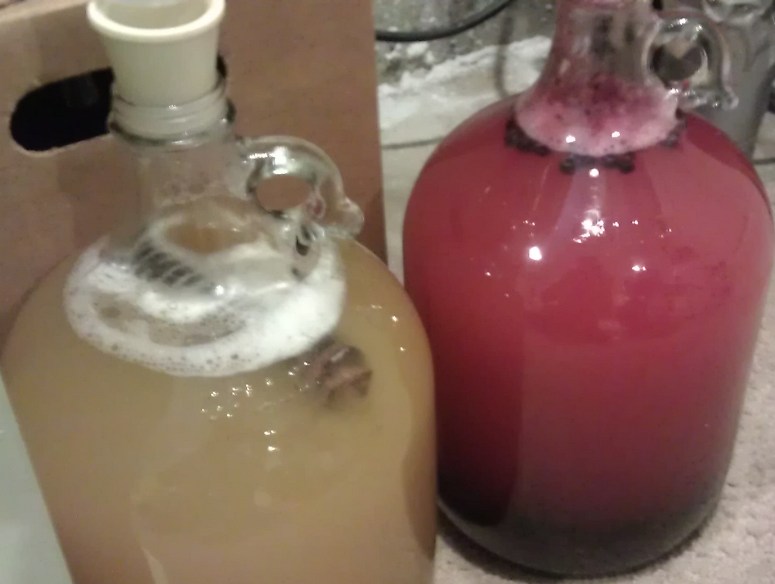
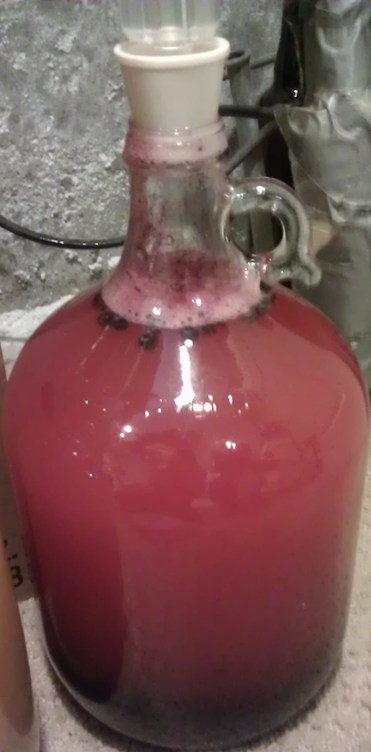
At the end of three weeks, I felt it was good time to siphon the mead onto some blueberries and oak, separately.  I have two jugs, both 1 gallon in volume, and decided to use them for these experiments.

For the blueberries, I read in The Compleat Meadmaker that I would need 5 to 7 pounds to get a medium level fruit flavor if I was adding them to 5 gallons of mead.   A quick calculation for a gallon of mead was 1+ pounds of the fruit.  Using frozen fruit has worked for me in the past, so I used frozen blueberries this time around as well.  With a sanitized funnel, I poured the berries into the gallon jug and then poured the mead on top of them until it was filled.

The oak experiment was simpler.  I had a portion of an oak spiral from my New England Hard Cider from last year hanging around.  I dropped it into the other jug and filled it with mead.  I didn’t steam the spiral as I have before and I am not sure if that will be a problem in terms of infection or other issues in terms of off-flavors.  I am taking that risk.

I racked the rest of the mead into a large carboy and it will be untainted by these additional additives.

Blueberry Mead     Oaked Mead     Mead Experiments

Now we wait.  I am going to let them chill out in the basement until they clear.  I am not sure how long that will take, but the sooner the better.

Note to self, I should add some pectic enzyme to the blueberry jug.

Page 168 of 322

Powered by WordPress & Theme by Anders Norén