Brew Dudes

Homebrewing Blog and Resource

The hobby of homebrewing beer

Red IPA Recipe

Brew Your Own magazine has an article in the latest issue about different sub-styles of IPAs.  The big one being black IPAs where I think there are a good number of commercial examples available.  The one variation that caught my imagination was the Red IPA. I like the idea of having a red ale with a smooth hop burst balanced with a soft, malty foundation.

The challenges I found with formulating this recipe was finding the right specialty malts to get the red color (we’ve written about this issue before) and determining the right balance of crystal malts so the beer didn’t end up too sweet and detracted from the hoppiness.

I kept the crystal malts to a minimum, only adding one caramel malt.  I am unsure if this is enough or not, but I am betting the Munich malt I put in the recipe will help with some of the perceived maltiness.

As an insurance policy, I added some sugar to the recipe to help dry the beer out.  Again, I don’t if it is necessary but I am trying a few things to strike the right balance.

The hop schedule is where the real magic is.  I picked non-piney varieties to blend well with the light caramel flavors.  Here is my Red IPA recipe:

Boil size: 7 gallons
Final batch size: 5.5 gallons
Volume for fermentation: 5 gallons

Ingredients:

11 lbs American 2-row
0.5 lbs Crystal Malt 90°L
3 oz De-Bittered Black Malt
0.5 lbs Munich 10°L Malt
0.5 lbs White Table Sugar
0.75 oz Warrior Hop Pellets (16.00 %AA) boiled 60 mins.
0.5 oz Nelson Sauvin Hop Pellets (14.00 %AA) boiled 10 mins.
0.5 oz Citra Hop Pellets (12.00 %AA) boiled 1 mins.
Yeast: White Labs WLP001 California Ale
1 oz Nelson Sauvin Hop Pellets (14.00 %AA) dry hopped
1 oz Citra Hop Pellets (12.00 %AA) boiled dry hopped

Instructions:

Mash the grains at 152° F for an hour. Sparge until you have 7 gallons of wort for the boil. Boil for 60 minutes and add the hops when indicated in the ingredient list. The table sugar can be added with 15 minutes to go.
Cool the wort to 70° F and ferment for 2 weeks at that temperature. Rack the beer to a clean and sanitized carboy and add the remainder of the hops. Dry hop for a week. Bottle or keg as usual.

Predictions:

Original Gravity: 1.058
Terminal Gravity: 1.012
Color: 17.35° SRM
Bitterness: 63.0 IBUs
Alcohol % by volume: 6.0 %

If you are looking for a new look, different take on an IPA, take this recipe for a spin and let me know what you think.

Brew on!
White Wheat or Red Wheat

Not that summer is exclusively reserved for wheat based beers, but being the season it seems like a good time to discuss a nagging issue regarding two major choices for malted wheat. Most of the time when you are brewing with wheat beer as the goal it’s usually 50% or more of the grist. Choosing the right malt in that case for your end flavor profile becomes pretty important at those levels.


The first misconception is that red wheat is red or has a darker lovibond rating that white. This is untrue. Often red and white are indistinguishable at a passing glance. We have read and seen in different places that red has a richer flavor than white. But what does that mean?

Secondly, an important difference is in the biochemistry of the wheats. Red wheat tends to have slightly more protein in it. Make it sought after by bread bakers. Red wheat’s bran is slightly darker which is an indication of its heartier flavor. However as brewers this may lead to slightly more tannin like nature in the beer.

The only way to truly figure out ones preference is to brew with them and taste them side by side. AND that’s the plan. We’ve been talking about the viruses of BIAB and small batch brewing. Exploring these two what’s varieties will be one of our next big projects!

Got experience working between white wheat or red wheat?
Got any nagging ingredient questions, myths or issues?
Drop us a comment!

Check out the plan for brewing in a bag to learn more about red vs. white wheat malt.

Lemon White Ale Recipe

There are two styles that I like to brew in the summer time. One is a Saison, which I plan to brew during the dog days.

The other style is witbier or white ale. I have brewed both styles a few times and have made some good beers. I had this idea for a variation of a typical white ale. The traditional citrus flavor that goes with a witbier is orange. I wonder if I brewed this style but using lemon as the fruit addition if it would be a hit or a miss.

The backbone of the recipe has wheat and pilsner malt but the lemon zest is the special ingredient. Check out this recipe for a Lemon White Ale.

Boil size: 7 gallons
Final batch size: 5.5 gallons
Volume for fermentation: 5 gallons

Ingredients:

6 lbs Pilsner Malt
5 lbs Wheat Malt
1  oz Willamette hop pellets 4.5 %AA boiled 60 mins.
.5 oz Willamette hop pellets 4.5 %AA boiled15 mins.
Yeast: White Labs WLP400 Belgian Wit Ale
30 g of lemon zest (approx. 6 medium lemons are needed)

Instructions:
Mash pilsner and wheat malt at 152°F for 60 minutes.  Use rice hulls if you feel like you need to prevent a stuck sparge. Collect seven gallons of wort for the boil. Boil for 60 minutes and add hops at the specified times.

Conventional wisdom and my own experience states that the fermentation temperatures should be cool so chill wort to 62° F and hold it there as the beer ferments for 2 weeks.

Once your final or terminal gravity is reached, rack the beer into a clean, sanitized carboy and add the lemon zest. Leave the beer to meld with the zest for 3 days. Check to see if the flavor is to your liking. If not, you may need to add more and/or wait a few days longer for the beer to condition. After the lemon flavor is approved, bottle or keg as usual.

Predictions:

Original Gravity: 1.051
Terminal Gravity: 1.010
Color: 3.05 °SRM
Bitterness: 17.0 IBUs
Alcohol (%volume): 5.1 %

Again, this is a different take on a style. If you haven’t brewed a witbier before, you may want to try a more traditional recipe.

I think this will be a really refreshing beer and one that if I am successful, I may put into regular rotation. The true key to this style is to keep those fermentation temperatures in the low 60s which can be hard to do in the summer when you don’t have things under control.

If you’d rather use oranges, follow Mike’s recipe for an Orange Wheat beer.

Brew in a Bag Introduction

Always looking for new ways to spice up our brewing process John and I decided to start thinking about Brew in a Bag. Brew in a bag, BIAB, has been gaining popularity over the past 5 years or so. Its a bit quicker and less intensive than traditional all grain brewing methods, but there seems to be no complaints on the web regarding a sacrifice of quality. John and I discuss some of the higher points in this Brew in a Bag introduction.

Brew in a bag start with this basic premise, you are going to mash in the same vessel that you plan to boil in. This means you’ll be removing the grains from the pot but leaving the liquid portion, wort, behind.

This is cleverly accomplished by using a mesh bag to hold the grain in. The bag and grain are removed after the mash leaving the wort in the pot. Of course you need to have a big enough bag, and you need to have a larger enough pot to contain the wort and the grains. Luckily this seems to play perfectly into most extract brewers current equipment kit.

A simple 5 gallon stock pot and a good nylon mesh bag will have you making brew in a bag beers at less than 5 gallons in no time. If you are used to doing a concentrated extract wort boil the a 5 gallon pot is probably what you already have; you just need the bag.

You can go a little bigger and invest in an 8-10 gallon pot. Get a bigger bag. And you are right back to 5 gallon batches again but doing it all grain. BIAB starts with heating the strike water in the kettle. Then opening and stretching the bag across the pot opening with the body of the bag down in the water. Then you add your grains right to the bag. You stir carefully so as to not pull the bag away from the pot. The best thing about mashing right in a brew pot, on the stove is that if you miss your temps you can easily add a little heat and keep stirring the grain to get back to your desired mash temp. You can even raise the temp to mash out levels using BIAB system. Although that isn’t usually necessary as once the grain bag is removed you start heating the wort to a boil right then.

So why would anyone that is already an established all grain brewer consider brew in a bag? For one its a little cleaner and faster process to get a batch going. Pretty attractive to us family brewers with little time on our hands. As I already eluded to, small batch brewing is very easy with BIAB. Another great reason to BIAB is experimentation and small batch sizes. One doesn’t have to commit to a full 5 gallons of Belgian Dark Strong if you’ve never made it before. BIAB is also a great way to experiment with new grist ingredients. BIAB also makes it much easier to try 100% wheat or rye beers (although I have heard 100% rye is pretty hard to swallow).

We look forward to getting a couple bags and giving it a try in the near future.

Do you brew in a bag? Are you ‘bag’ curious?
Let us know your thoughts and experiences in the comment section.

BREW ON!

Quick and Simple Home Hops Trellis Design

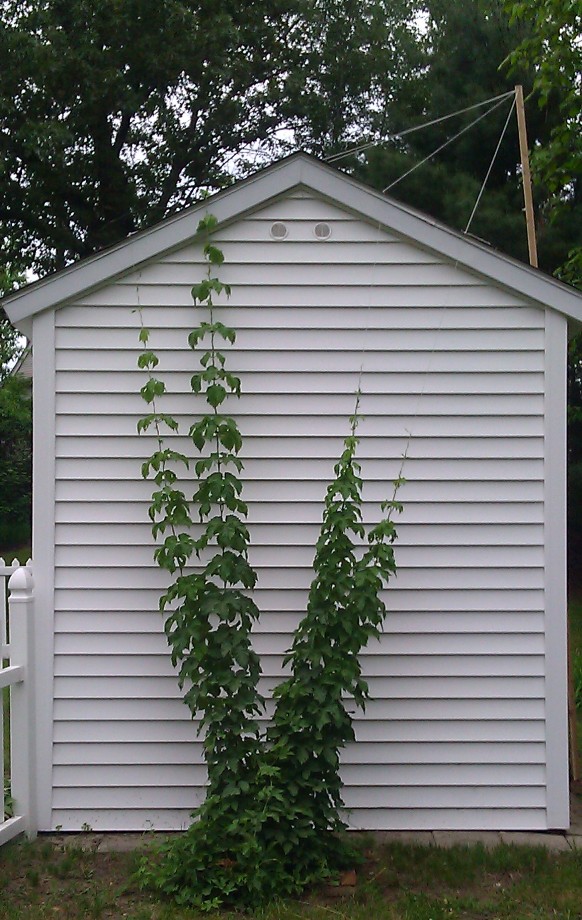
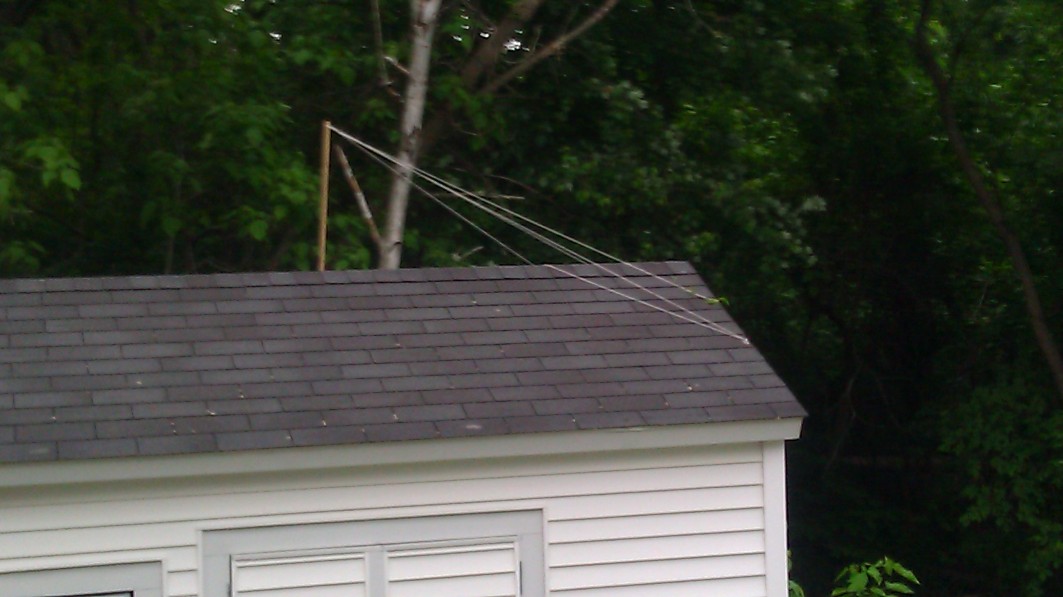
With little time and money, I put together this quick and simple hops trellis. It’s not much of a trellis as it is a pole with some string running through the top of it, but I needed a new solution. The tree that I used to hang strings over is now gone. Now, I have a new tall object for my hop bines to climb up.

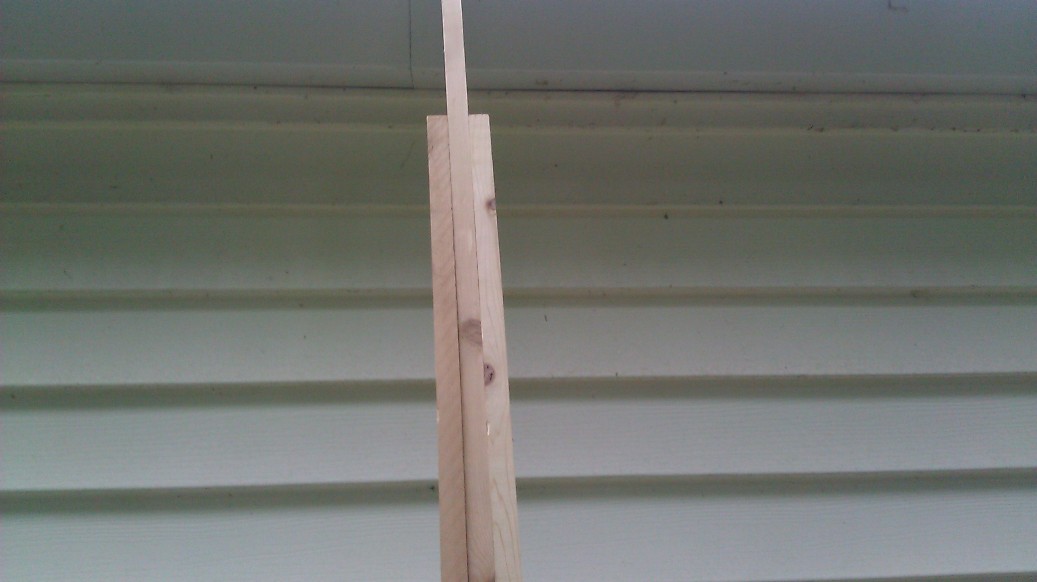
For less that 20 bucks, I bought four 1x2x8′ furring strips that I combined together to make a strong base and extend the height of the strips by nearly double.

The strips were fastened by wood screws and I drilled a hole in the top of the pole through which I ran strings. In less than a half hour, this home hops trellis was up and ready.

I positioned the pole on the side of my shed where the tree once was.

Home hops trellis

Where it resides today is not permanent. Next year, I would like to place it on the opposite side of my shed from where the hop bines grow. For that placement, I will need to get the height of the pole to around 20 feet.

To increase the height, I would add to the base and make it five boards wide to steady it using the same 8 foot tall furring strips. Following the same method I used to make this version of the pole, it should be easy to get the final height that I need.

Then, I will secure it in the ground and paint it white so it matches the shed. At least, I think that will be the best solution.

Here’s another shot of the pole from side of the shed where the hops are growing out of the ground.

Another angle of the home hops trellis

Right now, I have about 15 feet in height and another 8 feet in length from the top of the shed to the top of the pole. I believe I will have enough string for the hops to climb up and be happy. Again, when I have more time, I will be able to raise the height and have a permanent solution for this hop plant for the rest of its life. I am hoping it will have a long life. One last shot of the construction of this simple hops trellis.

Close up of the hops trellis construction

Brew on!

Page 135 of 322

Powered by WordPress & Theme by Anders Norén