Brew Dudes

Homebrewing Blog and Resource

The hobby of homebrewing beer

How To Brew

I visited Beer and Wine Hobby yesterday and picked up some cleaning and sanitizing supplies. I also picked up John Palmer’s How To Brew as an impulse buy. It’s his third edition so it has more stuff than is available online (that’s how I am justifying the purchase). Now I have something to read on the train to work (second justification).

HowToBrew

I will let you know what I learn from it.

Wort Chiller Purchased

I posted way back in August that I wanted to buy a wort chiller.  Well, I took my time to find a good bargain.  I saw a potential good deal on eBay, placed a bid, and won the auction…this internet thing is out of sight.  Can I still make ironic jokes about the internet?  Meh, I don’t care.

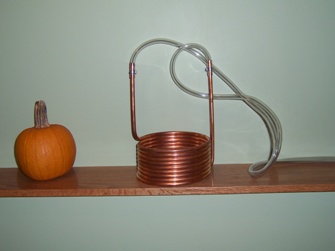
Here the wort-chiller I received via UPS yesterday:

Wort Chiller

That’s a 20 foot sized copper wort chiller. For those of you who are thinking about making the jump to larger pots for full 5-6 gallon boils, this piece is essential for dropping the temperature of your brew from just under boiling temps to fermentation temps. Other methods to cool your wort will take too long. The longer it takes for the wort to cool means the longer it is exposed to the elements and a larger chance for contamination from airborne pest like wild yeasts or bacteria. Contamination may result in your beer having off flavors…it may even undrinkable. That’s a bummer, let me tell you.

There are other wort chillers out there and we’ll talk about those in future posts, but the immersion style chiller is the cheapest but effective.

Maple Porter – First Tasting

After our jaunt to IncrediBREW, Mike, Brian, and I had a tasting session of all the beers currently in kegs.  These beers included a Strawberry Blonde (which hasn’t been profiled in detail on the site yet), an Oatmeal Stout, a Belgian Tripel, a Scottish 60 shilling (/-) and my Maple Porter.

A few of them weren’t really carbonated yet, but it was interesting to taste them in this early stage.  All of them were drinkable and I could go on and on about a few of them, especially the Oatmeal Stout, but this post’s focus is on the Maple Porter.

I was going to go through a large scale tasting description of the beer, but I think it’s too early to do that just yet.  So, I will keep it short.

Appearance:  Brown with some ruby tones when I held it to the sunlight.  It was cloudy, but it may clear up once the yeast settles.  No head since it wasn’t fully carbonated.

Aroma: Some maple, some roast, no hop aroma that I could detect.

Taste: Smoky, fruity, with hints of maple here and there.  Brian could definitely taste the maple.  Mouthfeel was rich, but that may change with the carbonation.  Flavor was, umm, complicated.  There was a lot going on, but not enough roastiness that one would expect from a Porter.  There was some alcohol heat that I could detect.  Finish was lingering with maple notes.

After tasting it a few times, I was happy with my experimental beer.  Mike thought it was more of a Brown ale than a Porter.  I have to agree with him.  I probably should have had some chocolate malt in my recipe.   I am going to submit it to the New England Homebrew Competition to get some expert notes on it as well.

When it has matured a bit more, we will taste it again.  I can imagine this beer will taste good in front of a fire this winter.

Check out my Maple Porter recipe.

Check out the Maple Porter brew day post.

Check out the progress of other beers in our Brew Log category page.

Going All-Grain – Part 1

I wanted to put up a post about starting down the path of all-grain brewing.  All-grain brewing gives you ultimate control over the wort.  You can control the exact proportion of base malt to specialty malts and you can control the body of the beer through mash temp.  These two factors are things that are out of your control as an extract brewer.  You can certainly “shop around” and make 3-4 pale ale recipes using base extract from different suppliers.  Maybe you’ll find one that’s just right.  What happens though if you don’t fine one that’s just right?  Well, that’s where all-grain comes in.

Before I continue…
Extract brewing is great in its own right.  You can make awesome beer with extract.  You can win awards with extract.  There are microbreweries out there based upon extract brewing!!!  There is absolutely nothing wrong with using extracts.  However, eventually you may want to see if you can “brew like the pros” or you may hit a wall in recipe tweaking that forces you to investigate the all-grain process.

In this first part of “Going All-Grain” I want to introduced the most important piece of the puzzle for getting there; the mash tun.  Now there are several ways to mash and lauter (rinse) your grains.  The method I employ is referred to as batch-sparging.  I’ll discuss the how and why in a subsequent post.  I want to focus this post on how I built my mash tun to start to give you some ideas.

First off I used a 50qt “cube” cooler that I got on sale one winter at Target.  It had a spot for a valve, but it wasn’t drilled out.  So I was free to do what I wanted.  I chose to keep it real simple and I purchased a second valve that you normally see on your bottling bucket.  I also purchase a rubber stopper that would fit into the port of the valve once inside the cooler.  I jammed a stainless steel T-fitting into the stopper.  To serve as a sieve to strain the wort from the grain I used the ever popular stainless steel hose braid.

Working with the braid can be tricky.  I simply hacked the end fitting off with a saw.  Then I cut it to my approximate length.  Wearing gloves, I carefully worked the rubber hose out of the interior of the braid so I was just left with the braid.

This picture is a close up of the valve on the cooler.

This picture is a close up of the braid clamped to the T-fitting and jammed into the stopper.

Here is what the whole thing looks like assembled inside the cooler.

Now you’ll notice that I doubled over the braid into two loops.  This isn’t really necessary.  In fact most other people you’ll just see one straight 5 inch piece of braid.  I went with the doubled over loop to increase my overall lautering profile with respect to the dimensions of the cooler.  This was to decrease the probability of channeling if I had decided that batch sparging wasn’t for me, or that I wanted to give fly sparging a try. (I will describe the differences in a future post).

Here is a picture of beautiful wort running out of the tun.  This was wort for the Belgian Tripel!

So that’s the basics of what my mash tun look like.  I’ll discuss how I set up my mash in part 2!!

In the mean time here… have a beer on me.

Read on for Going All Grain Part 2!

IncrediBREW

On Saturday morning (10/6/07), Mike and I went up to Nashua, NH to brew on premise at IncrediBREW.  I had a gift certificate that I got last Christmas from my wife and son which I finally got around to redeeming….ah almost 12 months later.  🙂

Another dude (Brian) came along to brew for the first time.
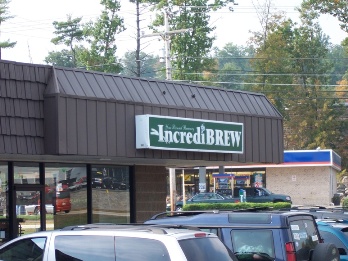
IncrediBREW Storefront

The only time they had available for brewing beer in the morning was 9AM, which was the hour they opened on Saturday. We got there a little late since Brian was a little tired from the Red Sox playoff game that he attended the night before (The lucky sonavagun).

The layout was logical and clean. They had a number of kettles ready for brewing.
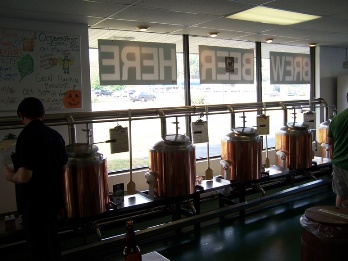
IncrediBREW Kettles

We let Brian pick out a recipe. He found a brown ale in the book, which was called Greg’s Peculiar…which looked to be a clone recipe of this beer.

Again, we let Brian gather most the ingredients and learn as much by doing the brew.

This recipe called for light and dark liquid malt extract that we got out of large barrels with huge spigots.
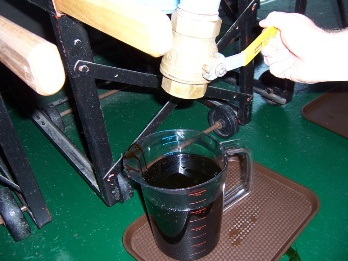
IncrediBREW Malt Extract

Some other ingredients of note were molasses and brown sugar. The recipe called for three hops additions for bittering, flavor, and aroma. The only hops used for this recipe was Fuggles, a traditional English hop variety that is described as mild and spicy. There were other specialty grain which were steeped 30 minutes before we started the boil.

Once the steeping was done and all the other ingredients were gathered, we were ready to brew.

Here’s a video of Brian adding the liquid malt to the kettle:

[youtube=http://www.youtube.com/watch?v=DH6S6kp_NTk 350 350]

We boiled for 40 minutes, which is shorter than usual for a homebrewer and added hops at the beginning of the boil (for bittering), with 10 minutes left to boil (for flavor), and at the end (for aroma).

The wort was then cooled and sent into a large plastic bag within a large plastic barrel for fermentation. We need to go back up there in two weeks to bottle. All and all, it was a good time and Brew Dudes recommended. If you go there, tell Dave we said “Hi!”.


Happy Brian

Page 314 of 322

Powered by WordPress & Theme by Anders Norén