Brew Dudes

Homebrewing Blog and Resource

The hobby of homebrewing beer

Noble Hops

The term “noble hops” is thrown around in beer marketing messaging a lot. It took me a while to look it up to learn what that actually meant. Every time I would see the phrase, I put it on my mental to do list to gather information about it. Even though I did this research a couple of years ago, I thought I would present it in a post:

The term noble hops refers to four varieties that are grown in Central Europe. I think these varieties were the first hops cultivated for brewing. I am guessing their long history has made them noble.

From what I have read, the variety has to be grown in the traditional region to be noble, so I have listed the variety name with some information about the region:

  • Saaz (which is the German name of the city of Žatec in the Czech Republic where this hop originates from)

All of these hops are characterized by lower bitterness yet bold aroma. It’s interesting to me that this region’s environment creates hops with these characteristics which play such a big part in the flavor and character of the region’s beer.

I love the fact that our surroundings shape us as much as we shape our surroundings.

Now the next time you see the phrase “noble hops”, you’ll know what it means.

2008 Samuel Adams LongShot Homebrewing Competition

For dudes growing up in the Boston area (like us), this contest is special. I think everyone who brews their own at home should submit something. There’s no entry fee and you gotta like the prizes if you win.

Sam Adams LongShot American Homebrew Contest

For complete details, go to the site…but some interesting notes include:

You have to send four bottles (between 10 and 14 ozs in volume) for each entry…and you have to keep three bottles of the same batch of beer in case you make the semi-finals…which they may need for lab analysis. Cool.

They are accepting entries starting on April 15 through May 1. So, you have some time to formulate recipes and get a brew together for submission.

As Mike would say, “Brew On!”

Beer Transfer Night

I had three beers in fermentors ready to be transferred to kegs the other night. I had my Winter Warmer, Oatmeal Stout #2, and an American Cream Ale. I took some pics to outline my keg cleaning process and getting things together. Just a little insight into my brew-house operations.
First off, I had no clean kegs ready so I had to make up a quick batch of hot PBW. I generally make about 2 gallons of warm PBW (not boiling) and I put that into my kegs, seal the lid, and shake. The real annoying part about cleaning kegs is that you also need to clean out that dip tube that runs the length of the keg. I have a long thin brush for this, but taking the coupler off and pulling the tubes is a pain. So I started to use a “jumper” connection to transfer hot beer from keg to keg. This allows me to shake the kegs to clean the kegs, then I push the hot PBW through the dip tube and into another keg, which cleans the dip tube and the ball lock connectors a the same time.

Here are my three kegs lined up to be cleaned.


Here is a small pot of PBW just about ready to transfer to the first keg. Just starting to foam from the heat.

I lined up all three fermentors on my work table. Doesn’t look like much but left to right is the Winter Warmer, Oatmeal Stout and Cream Ale. I actually brought these out to the cold garage the night before. This dropped the temps down to about 40-43F, and helps to crash out more of the solids in the brew.

This is a picture of the jumper connection I use. Notice it uses two “beverage out” connectors. This means I transfer cleanser out on dip tube and into the other dip tube, so I get double the cleaning time in the dip tube. Because transfer after transfer the cleanser travels in the tube and out of the dip tube for a complete cycle. (and yes, I do transfer back into that initial keg, to be sure that tube sees cleanser twice too).

Here is the transfer set up in progress. The keg on the right (not in the fridge) is hooked up to the gas manifold (grey connector), and it is full with PBW cleanser. You can see the double ended jumper between the two kegs. The keg on the left has the lid off and is ready to receive the hot cleanser. I just turn on the gas at 25PSI and blast the cleanser through. I let the gas run for about 10 seconds, then turn it off. That builds up enough pressure to push the whole keg through. No need to over do it and waste CO2 gas.

Once the transfer is done. I seal the keg with the cleanser and shake it up for a minute or so. Then I rinse out the first keg which is now clean and ready for sanitizer. I transfer sanitizer (Star-San) the same way through all the kegs and all the dip tubes.

I go through several kegs this way rather quickly with little scrubbing or effort on my part. I just let the cleanser and the equipment do the work. Sort of like a mini CIP (Clean in place) opertation. After all my kegs are cleaned up and ready for beer I just go down the line with a siphon transferring each beer to its new keg. I take a sample for my hydrometer on each brew for my notes.


Once all the kegs are filled, I purge the headspace with CO2 and then I connect all the kegs to the gas manifold and start force carbonating. In 5 days or so I’ll have three new beers fresh and ready to drink.
After all this work I called it quits and drew a quick pint of ESB to cap off an evening of beer chores.
Cheers!


Drinking Homebrew

Sometimes it’s all about reaping what you sow!

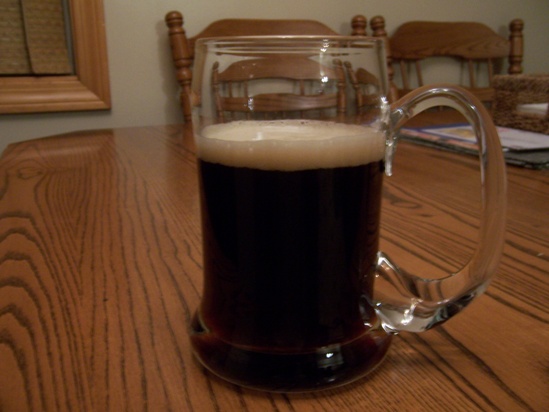
Drinking homebrewed maple porter

A homebrewed maple porter will do the trick!

Victory Malt

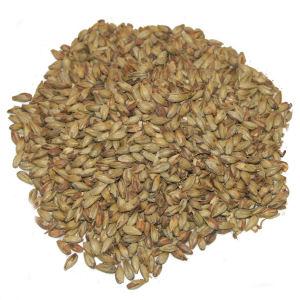
Victory malt has always intrigued me. Maybe it’s the name. I guess I feel like I would be “winning” if I used this malt in my brews. I did a little research and thought I would combine all the information into some kind comprehensive overview.

This malt’s creation is American in origin. I believe that refers to the process to make Victory malt was developed here in the USA.

The processing is different than the processing a maltster would use to create, for example, a caramel malt. It’s this special processing that gives the malt it’s flavor.

Flavor: Imparts a “toasty” character to beers.

  • Nutty taste
  • Biscuity
  • Baking Bread

Color: 25 – 28 Lovibond. Colors described from sources I discovered ranged from slight red to amber to orange highlights. I guess it depends on how much you use.

Body: Improves body and head retention.

Use: The malt has no diastatic power so you can use it as a steeping grain. Because of the flavor it imparts, Nut brown ales are a good candidate for this malt. I think it would be a good addition to dark beers, especially a porter. If you wanted to make an American Brown Ale and stay on theme, Victory malt would be a good addition. Probably no more than 20% of your grain bill.

Victory Malt

Learn more about other specialty malts:

Melanoidin Malt

Honey Malt

Chocolate Malt

Page 304 of 322

Powered by WordPress & Theme by Anders Norén