Brew Dudes

Homebrewing Blog and Resource

The hobby of homebrewing beer

Premiant Hops

I have been on a Czech hop profile kick.  This time around we examine Premiant hops.

An English dictionary would tell you that name means rewarding, and these hops do fit the bill.  They were released in 1996 and has been grown in other countries such as France since 2008.

All Czech hops have Saaz in their heritage as it is the case with Premiant hops.  They were bred using other, unnamed high alpha acid hops along with Saaz.

Here are the rest of the stats:

Origin: The Czech Republic

Aroma/Flavor: Interesting descriptions include clean, floral, slight citrus, pleasant, soft bitterness, well rounded and balanced bitterness

Alpha Acid: 7% – 9%

Typical Usage: It is a dual purpose hop in the sense that you can use them at the beginning of your boil.  The bitterness appears to be, by all reports, not harsh at all.  The aroma is supposedly stronger than Saaz so using them in large quantities at the end of your boil or in a dry hopping capacity may be fun to try. 

If you were to ask me how to use Premiant hops, I would tell you to use them as a bittering hop in some German lagers. They would save you some money since you would not need as much to get the level from the same amount of a noble hop variety.

If you liked the way that application turned out, then you could experiment on using them later in the boil.  I think any saison or farmhouse ale would work.

When I looked for substitutions for Premiant, I found a whole bunch of question marks.  If you found a recipe calling for these hops, I guess there is really nothing that takes their place.  I am sure that Saaz would do in a pinch.

Have a great time brewing with these hops.  As always, leave your comments below if you have used them.
Starting A Homebrew Club

Noting that this Saturday is Learn to Homebrew Day, we got to thinking about starting a homebrew club.

I, personally, am conflicted about the day. The first Saturday of November coincides with the Maine Brewers Fest, which has been a part of the Brew Dudes lives before the blog was conceived. So, the two of us are never in the same town and it has been near impossible to get an event going.

I guess it does not have to be that day, but it would be good gateway to recruit people to become Brew Dudes like us.

So there are a few other craft beer fans and homebrewers in our neighborhood. We know one fairly well. The other guy don’t know at all and it is through a chance meeting Mike had that we know that this guy exists…maybe.

I thought we could start with guys who are really nearby to see if there was any interest and go from there. The blog has a pretty good network of people on Facebook and Twitter. We could start using those platforms to get in touch with people who live within driving distance of our houses and see what kind of feedback we can get.

As far as clubs go, I have never set one up. I think if you get enough like-minded individuals committed to the idea of meeting regularly and have some clear understanding of what you want to accomplished, it should be easy to organize.

It’s the organization and persistence that will be the things to focus on. The benefits would be easy – a chance to get out of the house (!) and share and learn about homebrewed beer.

Anybody start up a homebrew club before? What makes a homebrew club worthwhile to be a part of? What do it take to make a homebrew club successful?

Brew Kettle Dip Tubes

Something that I never see adequately talked about online, in forums or on podcasts is how is everybody drawing their wort out of their kettles.

I see a lot of talk about immersion chillers vs. plate chillers. Or about how much or how little kettle trub you should have in your fermentor. But whenever, someone declares what side of these fences they stand on, they never actually tell us what’s going on in their kettle to make it happen.

Well in this video I try and lay it out there as to what your kettle options are.

I think about this one quite a bit from time to time. And I waver on what’s the best hardware setup in the kettle to get what I want. Maybe I just can’t be satisfied.

I currently draw wort out of my kettle using a dip tube that collects from the edge of the kettle. I accept a some degree of hop dregs and break material, while sacrificing some volume of wort in the batch (rectified by slightly larger batch amounts in the recipe).

Many people talk about whirlpooling to generate a nice cone of hop and break in the center of the pot. That way you are collecting clear beer from the edge. I am sorry but I have never been able to get a neat cone of junk in my kettle. I am certain its because of the bulkhead and the dip tube creating turbulence in the kettle as the wort spins around. So unless you use a plain pot with no internal hardware, and you use a racking cane and tubing to siphon out the wort… I believe you can forget the dream of some pretty cone in the middle of the kettle.

That said. Someday I’d really like to upgrade to a plate chiller. But I am terrified of the thing either A) Clogging on my mid-transfer or B) Harboring to much debris that it becomes impossible to adequately clean and it leads to the occasional contaminated batch.

So from there I’ll leave it to you dear reader. Watch the video. Then let us know where you stand. Do you siphon, or do you use brew kettle dip tubes? Do you suck it all up and out to get every last drop of wort? OR do you sacrifice some volume for clearer wort? How do you get clear wort? Suck from the side or do you use a screen or filter of some sort?

Let us know your thoughts.
BREW ON!

Smoked Meats and Homebrewed Beer

Every once in a while, you have to smoke some meat and serve some beer. It’s just something you have to do.

If you have a large quantity of homebrewed beer, you need to invite friends over to help you drink it.

Again, this is a law carved in stone somewhere.

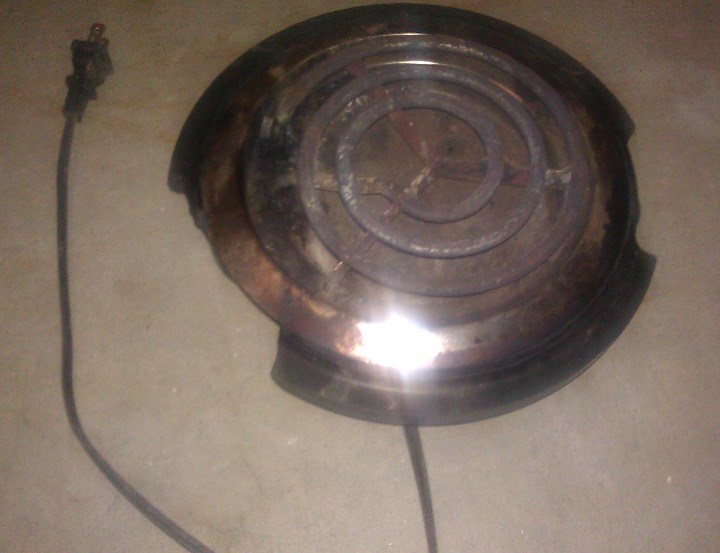
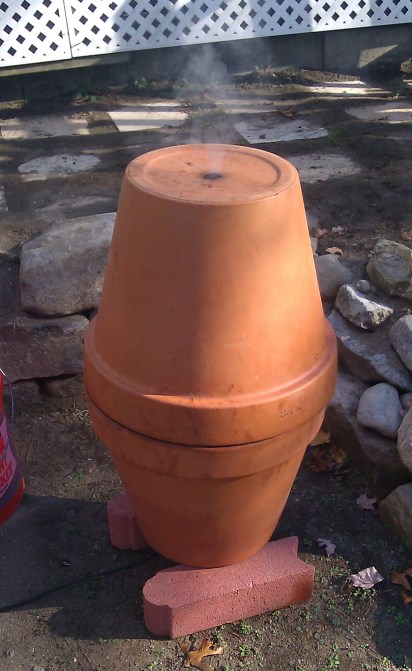
When it comes to smoked meat, I use my own homemade smoker that I made out of clay pots and an electric burner. There are some beautiful sights in this world and one of them is seeing sweet apple wood smoke puffs rising up into the sky while you are smoking meat.

Smoking Meats in a Homemade Smoker

For this get together, I bought turkey legs to smoke. I saw them in the store and thought they would be good.

Once the pulled pork was done, I smoked the legs (I bought 6) for 2 hours and then finished cooking them in the oven. Unlike the pork, I could roast them at a high temperature to make sure they were cooked through. The outside of the legs got a nice brown color which became darker after they were finished cooking.

Electric Burner

Along with the food, there was plenty of beer available as well. I had main offerings of Pilsner, Saison, Doppelbock, and my Autumn ale.

Mike smoked a brisket using dried wood chips from a chokecherry tree from his own yard. The smoke ring on the meat was intense. He also brought down his rolling keg system which had his blonde and pale ale on tap.

Everything came out well. We had a good time hanging out at the table – eating and drinking. The beer went well with all the smoky meat. I did have some sides – slaw and potatoes – but they were not the focus of the evening.

Homebrewed beer brings people together. I have seen it happen time and time again. Use your beer to create a community.

Upright Fridge as a Kegorator

This week we mix up the format a little bit and I give you a quick tour of my brewing space.  I show how I’ve transitioned to using an standard upright fridge as a kegorator vs. my old chest freezer.  Also, I put my mobile draft unit on display.  I recently used it for a party so I still had it out of storage.  So it was a good time to show that too.

The most important drawback of using a standard upright fridge as a kegorator is that the height of the kegs don’t leave much room for connecting and disconnecting gas and beverage lines.  You can see in the video there really is only 3 inches or so above the kegs.  This is pretty inconvenient if you don’t have permanent tap handles through the door.  I didn’t get into drilling holes into the door yet because I am not sure I am going to keep this fridge as a kegorator.  And once you drill the holes you are sort of stuck keeping as a kegorator.  This is another clear illustration as to why a chest freezer, outfitted with a wooden collar, is pretty superior when it comes to converting back to normal beer use.

I do however show how you can remove the door seal so you can remove the pre-molded plastic shelves from the door.  You can then re insulate the door with some foam core board, replace the seal and you are good to go.  This accomplishes two things.  First, you gain a little more depth in the fridge this way.  This is because those shelves do stick into the fridge cabinet itself some.  I found removing the shelves on my very first kegorator gave me a little more room for the CO2 tank.  Also by putting in nice and flat foam core inner door, it gives you a very clean and flat surface to help drilling and mounting the faucets and shanks through the door later.

The last thing I cover is my converted wheeled trash barrel into an insulated keg cooler. This thing is great and very useful for parties when your primary kegorator isn’t easily accessible to you guests.  I also use it a lot for taking kegs on the road to some ones house for a party.

I hope this stuff gives you a good idea of some of the other options to add to you kegging arsenal.
Enjoy the video and leave us some comments or questions.
BREW ON!


Page 152 of 322

Powered by WordPress & Theme by Anders Norén