Brew Dudes

Homebrewing Blog and Resource

The hobby of homebrewing beer

Tasting Jamil’s Schwarzbier

If anyone ever tells you lagers don’t make great winter beers, smack the pint out of their hand!  Introduce yourself to a German Schwarzbier.  Black Lager.

John took our Yule Lager challenge and thought a good roasty Black Lager would work well for the season.

This week, we tasted John’s efforts. He made a version of Jamil’s Schwarzbier. Jamil admits the recipe in Brewing Classic Styles for schwarzbier is a little too roasty for the style. However, he notes that it had still won him several awards and we can see why.

The roast is mild and not astringent.   While there are certainly pleasant chocolate notes in their as well, the roasted malt characters recede quiet quickly on the palate as the beer gives way to its true lager character with a clean and crisp finish.

The beer is so drinkable, it leaves you wanting more and you have to go back for a second sip.

The key difference between Jamil’s recipe and John’s beer is his use of homegrown hops.  He added all the Mt. Hood hops that he harvested this year into the beer, which was two and a half ounces.  They were added at the end of the boil and although their aroma did not shine through the roasty notes, they seemed balanced with the other flavors in the beer.

John comments that this beer may even be his best stout yet.  He’s joking, of course, but we  do find comparisons to Brown Porter, Stout, and even Baltic Porter.  Give this one a try yourself before winter slips away or put it in your queue for to brew after the next Thanksgiving holiday.  If you would like to learn how to brew this beer, you can find the black lager recipe here.

To get even more details about how this beer was brewed, check out the black lager brew day and relive the events.

Have you brewed up Jamil’s Schwarzbier? Tell us about it in the comments.

BREW ON!
What To Do To Cider After Fermentation Is Done

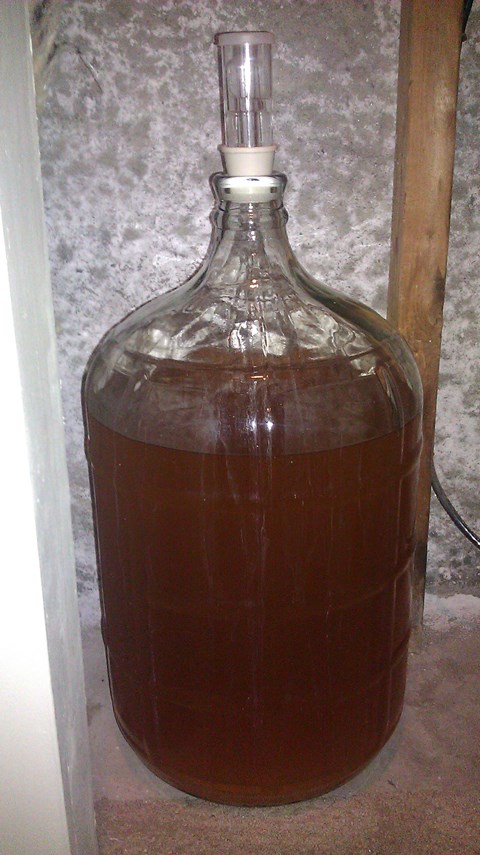
The cider I made back in October has been conditioning in my basements for a few months now.

Hard Cider Conditioning For A Few Months

As you may be able to see, it isn’t super clear but that’s all I may get with this batch. When I take samples out to look at in a glass, it appears much lighter and clearer. With the time that elapsed and the clarity that I see in the samples, it’s time to bottle this cider.

I listened to the Brewing Network podcast with Drew Beechum and one of the big points I took away from it was that cider is not done when fermentation is over. Making an excellent cider is what you do with it after the yeast have done their thing.

In the past, I have experimented with backsweetening using apple concentrate, sugar, or a non-fermentable sweetener like aspartame (yuck). I have not added sorbate to hinder yeast growth so it’s more of a tight rope act of letting the yeast ferment some of the sugar to carbonate and then cold crash/drink quickly the cider. In other times, my yeast have been too pooped to carbonate and just adding a little bit of sugar or apple juice at bottling has been enough to even out the flavor.

I learned about a malolactic fermentation which is brought on by adding bacteria to the cider which will convert the malic acid to lactic acid. From my tasting of what I have in the carboy right now, tartness is not an issue.

What is an issue may be figuring out how to make this cider stand out. The cider is fine and all but I am not sure it’s great. It might be worth drawing out another small sample and have another person weigh in with their ideas.

With the English ale yeast that I used, it may be good to go as is. Because of the long conditioning time, a champagne yeast will be added at bottle with just a little sugar for carbonation. I will update you on the findings and the plan.

Cider ON!

Pssst! Check out how this cider came out by watching our tasting video.

Building A Brew Stand – An Introduction

I am not a perfectionist by any stretch of the imagination. I do realize however that when it comes to brewing, I really feel good about a brew session when it seems to go predictably and consistently as the previous one I also really like the idea of having a brewing “plant” that requires minimal setup and breakdown session to session.

For those reasons, I have thought numerous times about building a brew stand. I am focused on building a stand that keeps my pump, burners, and kettles all together as one unit. I think it will help streamline the setup and breakdown of each session. It will also create a more “rigid” feel to my brewing process that I think will contribute to a more consistent and predictable brewing process.

Right now, my stand is an old aquarium stand made out of pretty hefty angle iron. One side of the stand is a decorative wire “lattice” like thing. I suppose it looks nice but it does make the stand seem a little precarious missing a whole set of legs on one side. I am also a little concerned about how high the current stand is. When I put the vessels on top, like the kegs you’ll see in the video, they are a little high. I can still stir easily enough for mashing in but if they were lower, it might be a little easier. I might try and clamp my current burner underneath the stand to see how it would work at this height.

In an effort to make my brew sessions a little shorter (I am a family guy after all and brewing windows are getting narrower and narrower.) I’d like to get a plate chiller. I expect a plate chiller to reduce my sessions by about 30-40 minutes. I love my immersion chiller setup. But if I could mount a plate chiller just below the kettle on the end of the stand, I’d be able to chill while moving wort from the kettle to the fermentor. To me that sounds like a great time saver.

The biggest challenge will come with plumbing the system in for propane. I currently brew with only two burners, but getting a third burner would be nice for heating sparge water and it would save me the time of transferring wort to a bucket before I move it to the kettle. I have been reading a lot about gas orifices and needle control valves. I also just completed a black pipe job installing a new gas stove in my kitchen so I feel pretty confident about setting up the brew stand with some rigid piping for the burners.

In this week’s video, I show you what the aquarium stand looks like now and talk about some of my ideas to start moving forward.

Have you ever built a brew stand?

Thinking about it?

What has your research told you that I may be missing so far?

Feel free to leave a comment and tell me what you think.

Cheers.

The Great Beer Purge of 2014

In an earlier post, I alluded to that a great cleansing would come. There has been a large build up of mediocrity occurring in my basement and it was crying for a purge.

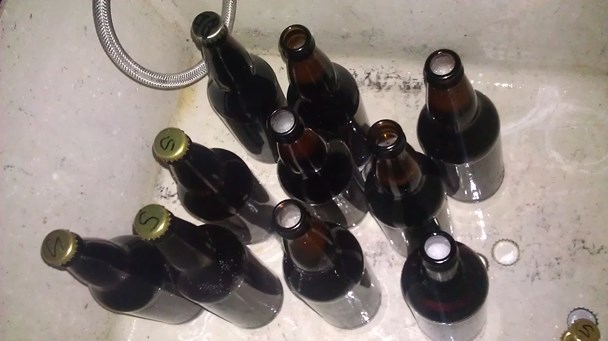
Tonight, I pressed the figurative reset button on a large amount of the beer I had in storage. The caps were popped on an assorted case of 22 ounce bottle and the contents were poured down the drain.

Here a photo of the carnage:

Beer Purge of 2014

Most of me is against getting rid of any beer but I knew these were bad examples of beers and they were not going to be enjoyed by anyone any time soon.

I could not help but feel like Eliot Ness, watching the beer foam up in the bottom of the sink and slowly tumbling down the drain.

The Saison hadn’t come out the way I planned. The Doppelbock was more like a bock and I learned what I need to learn to brew that better next time. The Pilsners weren’t getting any better in their advanced age.

Did I get rid of everything? No – I still have a few bottles left of each style that are mentioned above to study academically at some later date. I can say that enough bottles were freed up to make way with the new stuff that will be ready in the near future.

In February, there will be a cider to bottle. I will need to add a little bit of yeast along with some simple sugars at bottling so that it will carbonate. The English ale yeast that I used for fermentation is spent so some reinforcements will be called in to help out.

In March, there will be the Vienna Lager to bottle. It’s lagering now and will be more than ready around St. Patrick’s day (not traditional).

And sometime in between the cider and the lager, there will be a dunkelweizen.

Stay tuned. From our losses, there will be gains. Brew on.

Best Yeast Strain For A Dunkelweizen?

The next beer I am planning to brew is a Dunkelweizen. The plan is a holdover from last year’s brewing resolutions, which I, uh, didn’t get around to doing.

With the brushing of that missed commitment under the brew house rug, I can focus on what is ahead and this German wheat beer is in my sights.

The question I have for you, fair reader, is which yeast strain is the best for a dunkelweizen?

Some quick online queries brought back some of the usual suspects, the yeast strains that I know for wheat beers of German origin. Many of the discussions were primarily around which yeast strains are best for hefeweizen with some side comments about how they were good for dunkelweizens as well.

Here are a few strains that I was thinking about using. If you have thoughts or experiences with any of them or if you know of one that I don’t have listed here, leave a comment.

1. Wyeast 3068- Weihenstephan Weizen

With a claim that the strain is the most popular German wheat beer in the world, how could one go wrong using it for a Dunkelweizen? Popular does not always equal good in the beer world, but in this case, I think it may ok in this context.

2. White Labs WLP300 Hefeweizen Ale

It’s hard to get excited for this strain after typing out the name of the Wyeast strain right above this one. The generic title doesn’t ignite the imagination of the eager home brewer hoping to produce an excellent beer. I included this one because I am a fan of White Labs and they are my go-to yeast brand.

3. Danstar Munich Wheat Beer

Dry yeast strains should not be ignored. One of the takeaways from last year’s Saison throwdown was that a dry yeast strain can turn out a great version of a farmhouse ale. Although I don’t have any experience with this Danstar offering, maybe you have used it before?

That concludes my list of considerations for my dunkelweizen. From the liquid yeast producers, there are a good number of variations on the German wheat beer theme. For instance, has anyone used the WLP380 Hefeweizen IV Ale strain? Is it an improvement on the original? Let me know your thoughts below.

Page 145 of 322

Powered by WordPress & Theme by Anders Norén