Brew Dudes

Homebrewing Blog and Resource

The hobby of homebrewing beer

Kegorator Rebuild

Towards the end of last summer we had two solid weeks of very hot weather.  Normal here in the northeast we will get two or three days in a row of oppressive humid heat, followed by a little breather.  But last summer that two week stretch had my old chest freezer running pretty hard. So hard I think the compressor burnt out.

Things are starting to warm up again and with that its time to get the draft lines flowing again.
Time to jump into a kegorator rebuild.

I have been using a standard upright fridge since last fall to keep kegs cold. I’ve been pouring beer with cobra/picnic taps. With the warmer spring weather I decided to get my faucets and drip trays moved from the old chest freezer over to the fridge.

Now using a fridge isn’t my favorite way to do a kegorator. But this way I can get beer flowing and not spend any extra money on a replacement fridge. (Funneling money to the brew stand build is my current priority.)

Simply put I dove into this project and it went much smoother than I expected. I thought I’d have some trouble with the way the inside of the door was molded, but that turned out to not be a problem at all. I got all four faucets nicely positioned on the door of the fridge.

I converted an upright once before many years ago. For that build I actually removed the plastic molded shelving from inside the door and replaced the insulation with pink foam core board. Worked well. But I do like the ability to keep the door shelves to temporarily hold hops and yeast as I near brew days.

My next steps will be to plumb the tubing onto the shanks. Clean out the lines and faucets with line cleaner. Lastly, hook it all up, test for leaks and let the system balance out for good clean pours. I hope to put up a follow up video to this one when I get those final touches done in the next week or so.

BREW ON!
New Hops Trellis

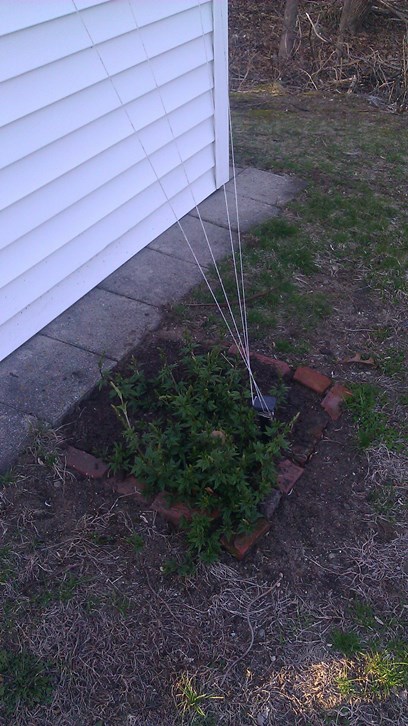
For many years, I had what I will call a hops growing system that involved my shed and the tree that hung over it.

The strings that the hops climbed on were fastened to the top of the shed, about twelve feet up in the air.  Then, an extension of those strings were connected from the shed’s roof to a tall branch of the tree, giving me a total of eighteen feet of height for the bines to grow.

In the fall, the tree came down and now I need to figure out a new hops trellis solution for this year’s growing season.

There are two leading ideas for what I could do.  The first one involves adding some kind of structure to the top of the shed’s roof to regain the majestic heights of the previous system.

The other thought is to put up a new, free standing structure that would built either right in front of the shed or have it stand thirteen or so feet away from where the bines grow (if I am remembering my Pythagorean theorem correctly).

The final decision will be made weighing several factors, but mostly it will be decided on the easiest method. Adding a structure to the top of the shed will need to be done so that it doesn’t ruin the shed.  I am not sure how to do that at this point.

The free standing pole is probably easier to do but will need more planning.  It could sit next to the plot and go straight up.  The other way would be to have them hang over some of the yard at a 45 degree angle.  If I did it that way, I would not need to build a pole as tall.

The other factor is what my wife will allow me to do.  She may not like seeing a leaning trellis or may think it’s ugly or what have you.

I am starting to look at some different trellis plans online now and trying to figure out what would be best for me.

If you have experience putting on up for your own homegrown hops, let me know.

Take a look at my temporary solution here.

Oatmeal Stout Brewing Tips

Brewing a better Oatmeal Stout is an ever evolving goal of mine.  Oatmeal Stout was the second style I brewed when I first started brewing many many batches ago.  To me Oatmeal Stout should be roasty with a decidedly chocolate like lean.  It should be smooth, silky and balanced.  There should be a well perceived presence of toast bread or biscuit like quality.  There should be a mild caramel that pulls it all together.  Three things come to mind to put you on the path to developing YOUR best Oatmeal Stout.

First of, like so many beers, you have to nail your fermentation.  For the most part this is an English style stout.  You want some supporting fermentation derived ester qualities in the beer.  This is perfectly delivered by most English Ale yeast strains.  Problem is, English style yeasts tend to have medium to ‘less that desireable’ attentuation potential.  These yeasts often ferment fast and fall out a little early.  In order to get the crystal malt, the chocolate malts and the oatmeal to all play well at the front of the stage you have to get all the other residual fermentables fermented out.  For me I accomplish this by starting my fermentations a little cool (62F) for the first 48 hours. Then I set the temp to 66F and let fermentation start to take off for two more days.  Then I ramp it to 69F and let it ride for three more days. After that I set the temp to 72F and let it go for another 7 to 10 days.  By doing it this way you can coax most English Ale strains to go the distance and reach their reported higher end of attenuation.  Of course, a moderate amount of O2 and some yeast nutrient helps too.
I wish I could tell you what my favorite yeast strain is…but I don’t think I am quite there yet.  For the last two years I’ve been have good luck with WLP013, London Ale yeast, but I have used WLP007 when I find myself struggling with temp control.  WLP002 can be perfect if you know you can dial in the fermentability from your mash regime, use great temp control and have a very active kick-ass starter.

Second step is to blend your crystal malts.  My main point here is to develop some interesting caramel background tones and complexity by using two different crystal malts.  Lately I really like a 75/25 split of C40 and C80.  But its often a toss up of C80 v C120; depends on my mood.  You need to explore these combos based on your own palette.  You can start mixing three together but its a tight wire to walk on for sure.  In order to get appreciable flavor from any malt there is a minimum you need to use (again palette dependent). So when you go to three you might find yourself drifting into two much crystal malt which makes the beer harder to get dry enough.  Stick with two in combo seems to have been the best for me.

Lastly, you have to toast your oats.  Not all of them maybe a half to a third.  I have found that I need at least one pound for a typical 5 gallon batch to be just plain oats for the requisite mouthfeel goal.  Toasting an additional 50% seems to have been the magic number to get that biscuit like quality without actually adding yet another malt (i.e. biscuit malt) to the grist.  Adding another malt to the grist then brings us back to point #1 about dryness and fermentation.

Oatmeal Stout has been a fickle beast for me.  Sometimes that first pour of a new batch is just perfect, then others seem off the mark.  But these three points have driven it home for me and seem the common thread when I do get batches that seem close to divinity.

Cheers

Home Brew Club Plan

The AHA Big Brew Day is coming up on May 3 and Mike and I are going to use the occasion to start our homebrew club.

I think we posted something about this notion a while ago.  Well, it’s time we made some ideas turn into things.

We have at least a couple of other guys who want to join up.  I think there was a guy on Twitter who wanted us to contact him to let him know once we got our stuff together.  Finally I can tweet that guy with a plan.

With this club, we will probably need a catchy name or at least something unique.  Heck, there’s at least a few different brew dudes on the internet.  You’d think we’d be able to come up with something that was our own.

(I think we were first but who’s keeping score?)

There are some things that we will have to do make it a legitimate club.  We’ll probably needs a separate site to keep the official home brew club stuff in its own place, although the insider stuff will probably remain here on this blog.

We’ll have to set regular meeting times and dates to keep it going.  The worst thing that could happen is to have this one event, clink glasses, go home, and never see each other again.  Certainly, the second meeting may be more important than the first, just to prove that the first one wasn’t some fluke.

I am looking forward to sharing ideas with people.  Experiments may be easier to run and better for reporting results when you have more points of data (more people to do the experiment).

We may need to rent a hall or some space to meet.  Once we get rolling, it may be harder to keep having the meetings at somebody’s house.

Outside of that, since not everybody who reads this blog lives near us, I wonder if other clubs have remote members in which the people play along by sending beers to the main location and we converse through Google Hangouts or other free video conferencing services.  I don’t know if anyone would be interested in that, but if you would like to be a remote member of the club – let us know.  You are definitely invited.

So that’s it – that’s the home brew club plan.  We’re going to kick it off on May 3 and we’ll report in this space about it but probably on our social media accounts on the day it happens.

Thanks for reading and brew on.

Sour Blends for Making Sour Beers

Do you ever feel that you get behind in your home brewing because other things need your attention?  There was a dunkelweizen sitting in my basement for three and a half weeks and it was just waiting for me to take it to its final destination.  I finally got around to getting all the things  I needed to get done and it is bottled.

Now, I can focus on brewing a lambic.

Since it will be my first time, I plan to use a sour blend from one of the big yeast providers.  I am not sold on the idea of using dregs from sour beers.  Mike’s less than successful attempt at harvesting bottle dregs convinced me that going down that road was adding too many things I don’t have much experience with to the mix.

The grain bill will be simple and the old hops I have.  The real thing to investigate and learn more about was the sour blends that were available to me.

I like the Roeselare Sour Blend from Wyeast since it name drops the region of the world where these beers are from but also from the list of stuff that is in it:

  • Belgian style ale yeast strain
  • A sherry yeast strain
  • Two Brettanomyces strains
  • A Lactobacillus culture
  • A Pediococcus culture

That’s a quite a group.

With knowing more about the blend, there are two things I’m thinking about and they are related to each other.  I have seen recipes that call for adding a neutral ale strain to get things going and then adding the sour blend after some time has gone by after fermentation has started.  I am not sure if I need to add another strain.

The second thing, that is if I decide to go down the route of adding, say, a California ale yeast strain, is when to add the sour blend. Should I wait three days or a week to add the blend or should I add it all at the beginning?  Does the sour blend get the beer sour enough if I add it later during the fermentation schedule?

The thing is, no matter what I try, I can always do the opposite on a later batch.  The real ingredient to these sour beers is time.  It takes time for a sour beer to mature into something that is really drinkable and also, it takes time to brew multiple batches that you can blend later.  If I can hack it, I will brew a sour beer once a year every year and then blend, blend, blend.

Page 139 of 322

Powered by WordPress & Theme by Anders Norén